Exercise 3: Integration Hub (30mins)
During the discovery interviews with the Supplier Management team, it was often mentioned that they spend a significant amount of time checking the supplier’s business registration against the local business registries. This requires them to manually log into the business license portal and to pull out the license information and manually verify one by one. Fortunately, the business license registry offers an API to get information from each license number that we can use to make this process seamless, which we will use in Integration Hub.
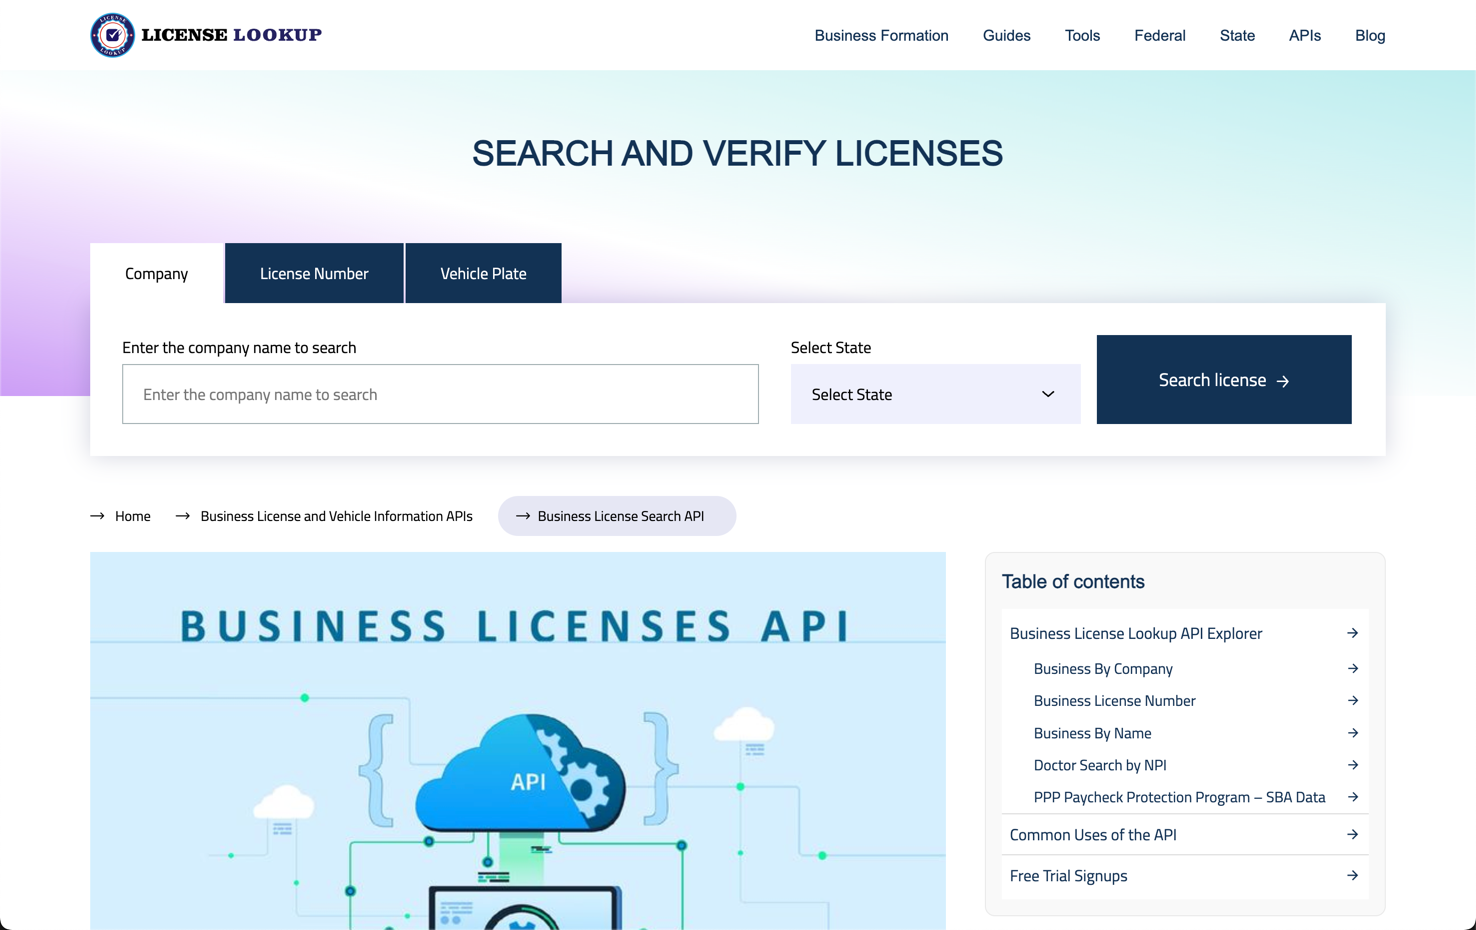
In the lab, we will simulate calling a simulated API, which is modeled after an actual API provider: License Lookup. Check it out here: https://apis.licenselookup.org/business-license-search-api/
Adding a new field to our custom table
We first have to add a field to our custom Business License table to mark whether the record has been verified.
-
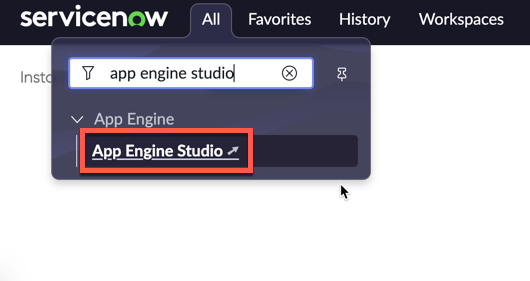
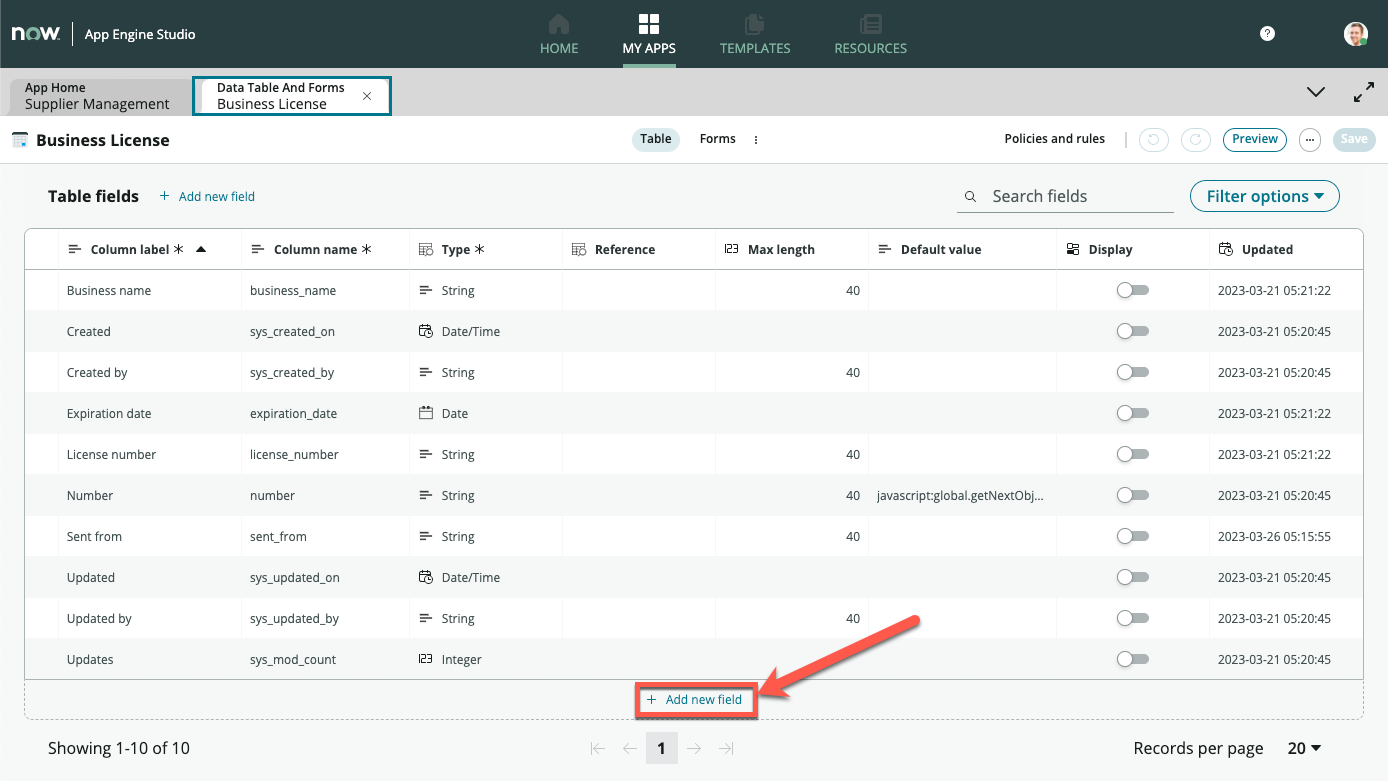
Under All, search and navigate to App Engine Studio
-
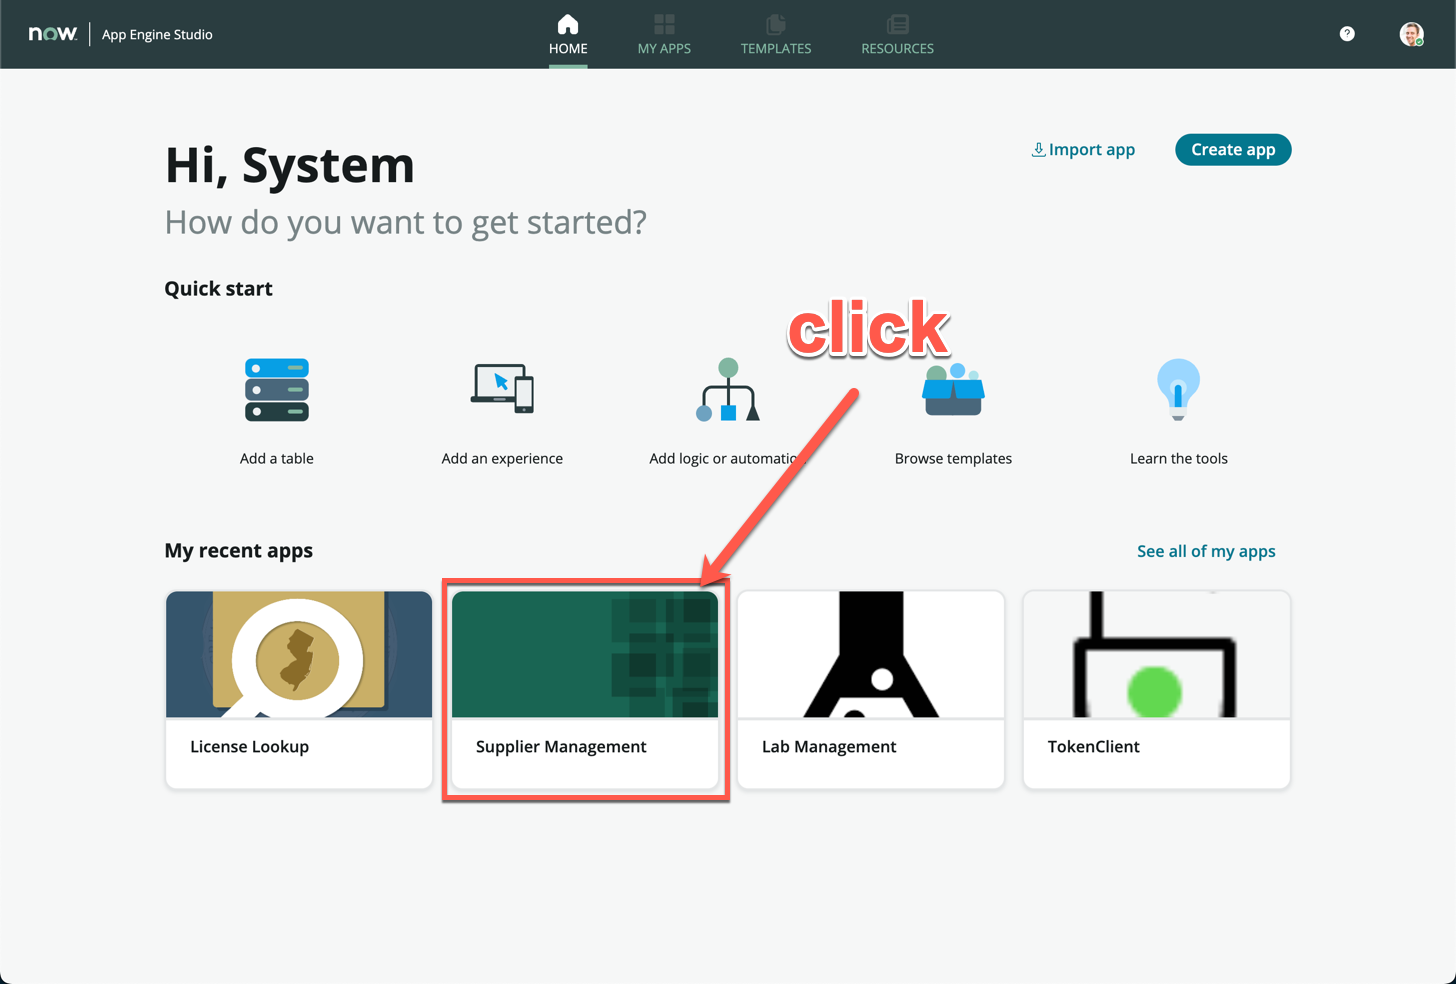
In the My recent apps section, click Supplier Management
-
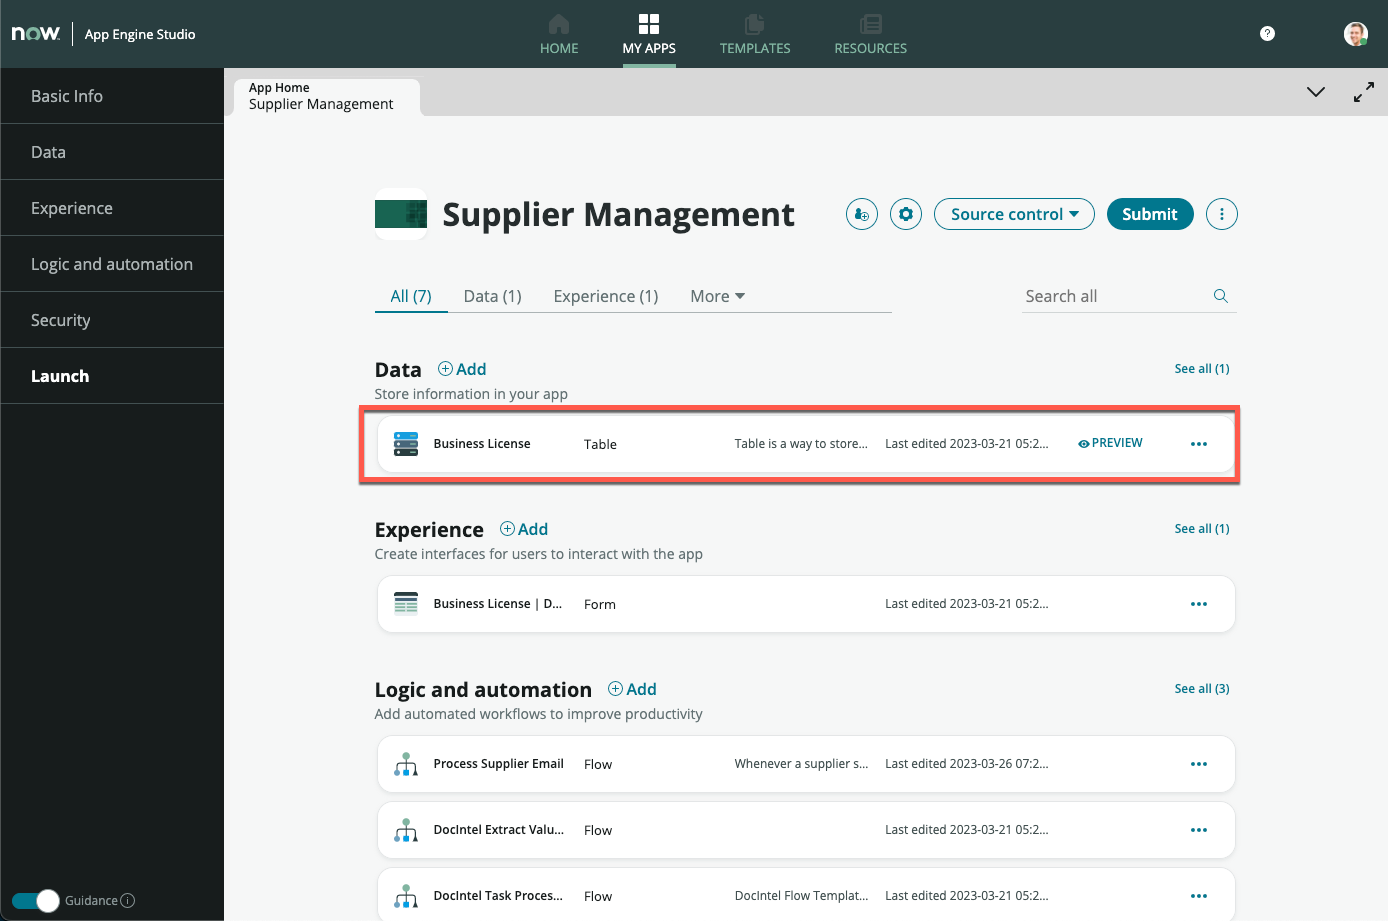
Under Data, click the Business License table
-
In the Table Builder view, click + Add new field
-
Under Column label, enter Registry verified (1)
-
On the same row, under Type, change the value from String to True/False (2)
-
Click Save on the top right of Table Builder (3)
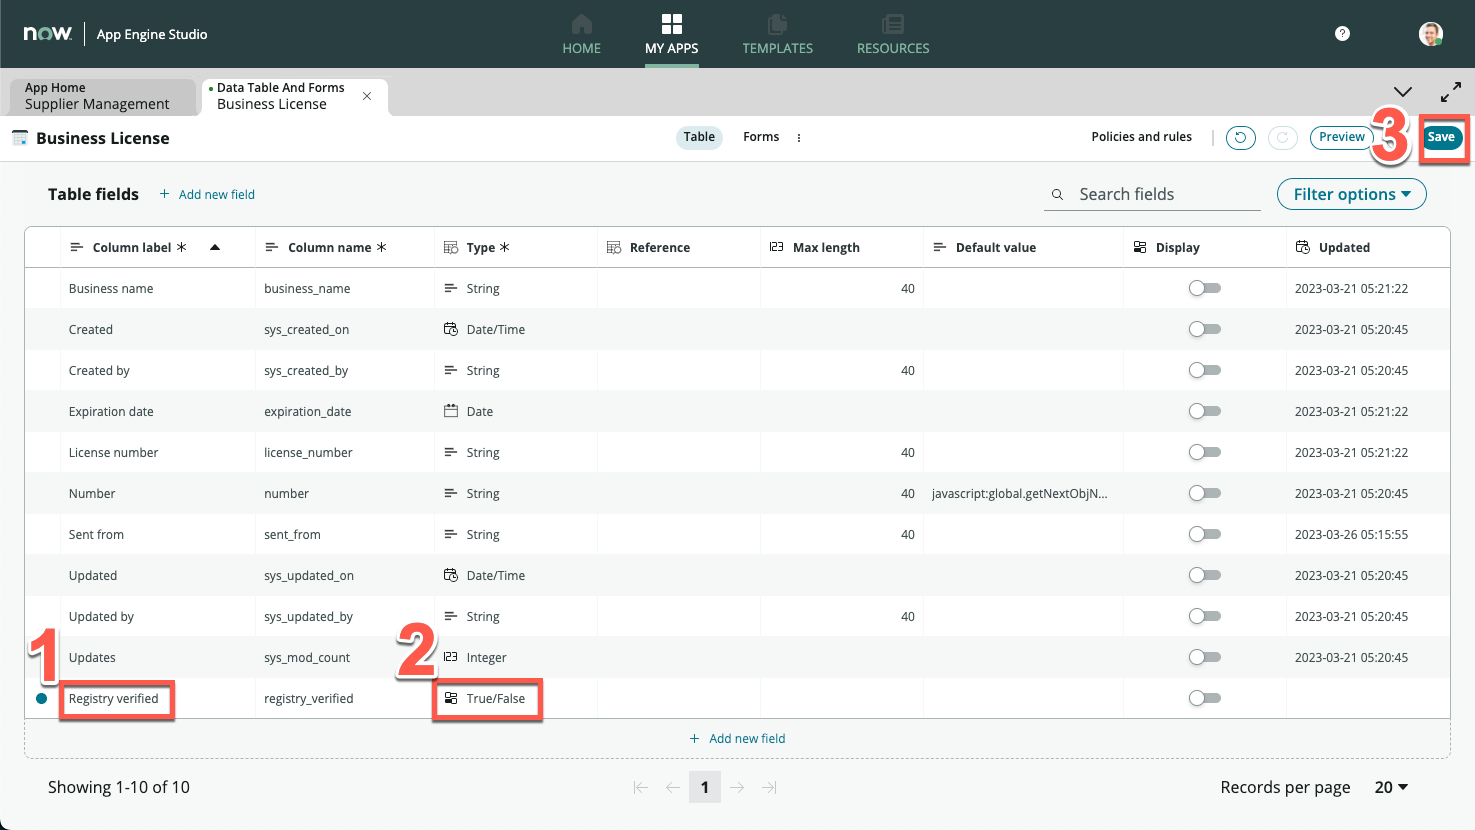
Table builder comes standard in every Hyperautomation toolbox. Make sure you know how to use it effectively to construct the foundations of your applications.
Creating a custom action to connect via API
Now that we have the Registry verified field to indicate whether a record has been verified, we will use the Business License Search API to populate this field. We will first create a custom action to integrate with this API service, before using it in a flow.
-
Navigate back to the main ServiceNow UI
-
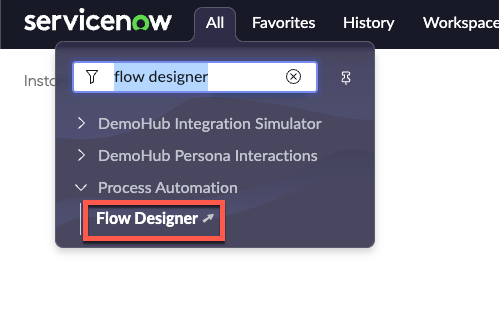
Under All, search and navigate to Flow Designer
-
Flow Designer will open in a new browser tab
-
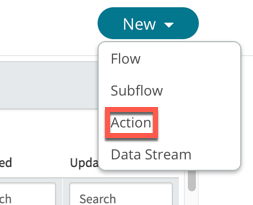
On the top right of the screen, click New, then click Action
-
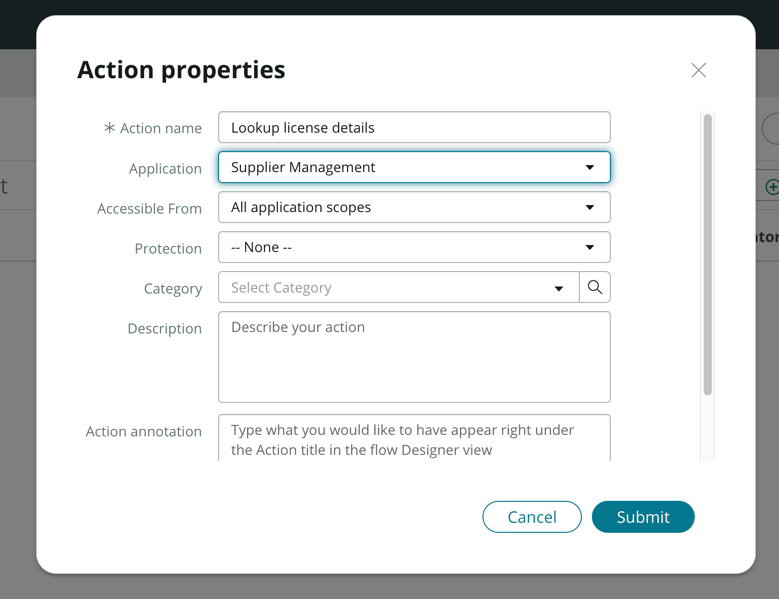
Under Action name, enter Lookup license details
-
Leave Application as Supplier Management
-
Click Submit
-
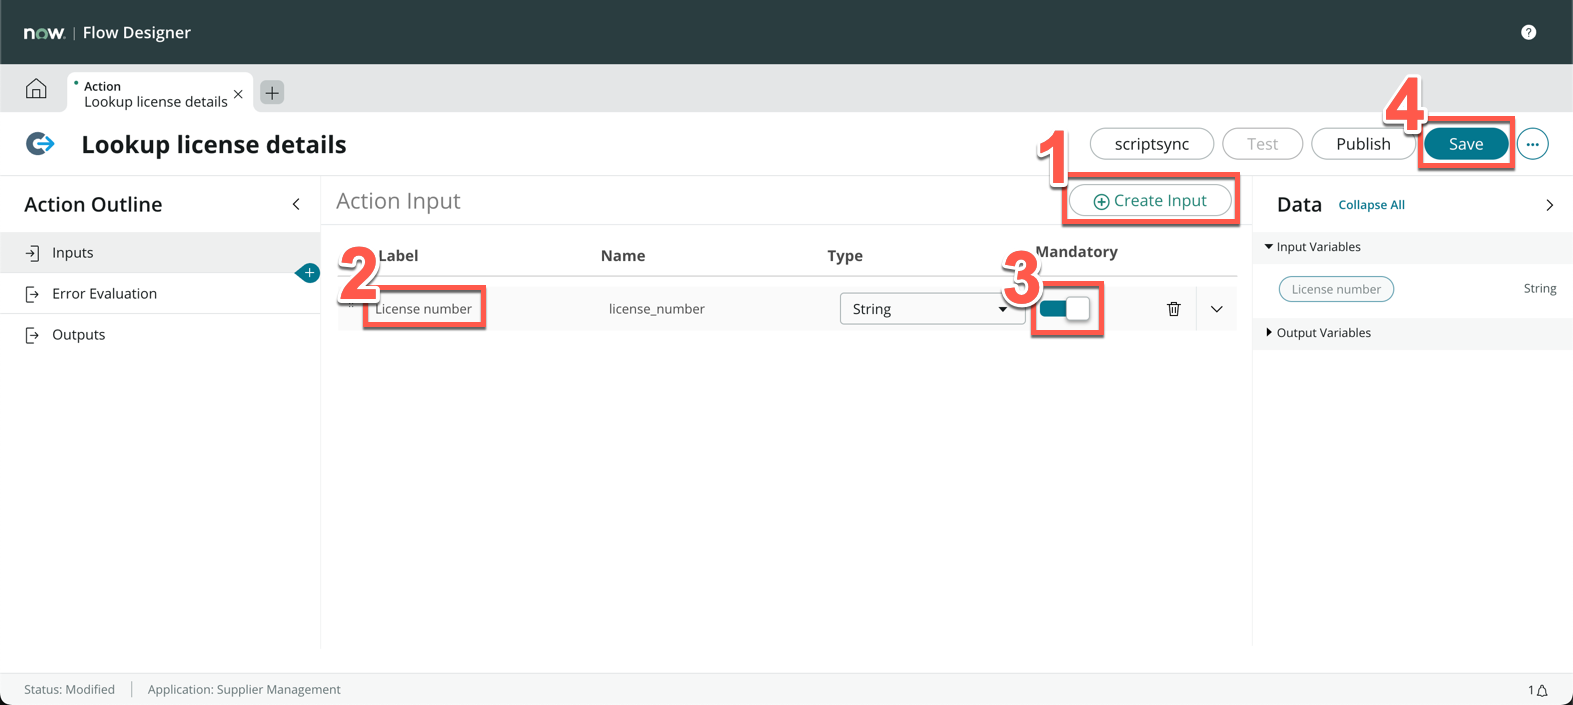
Click Create Input (1)
-
In the new row that appears, change Label to License number (2), the name column will automatically populate with license_number
-
Toggle Mandatory to true (3)
-
Click Save on the top right (4)
-
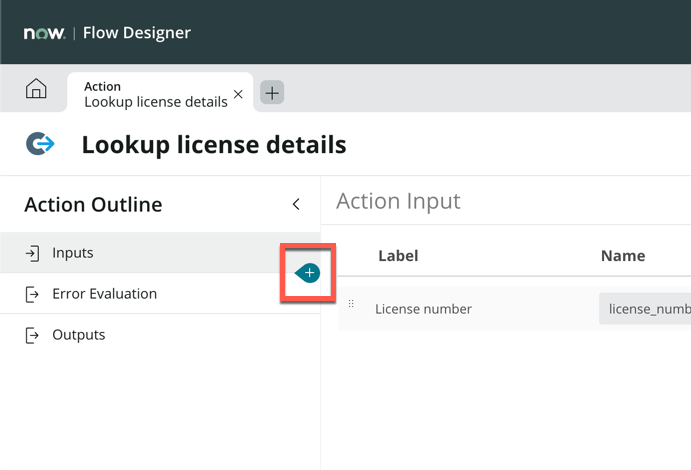
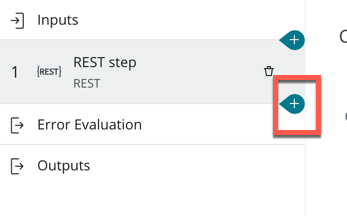
Click Add new step icon on the left side of the screen, in between Inputs and Error Evaluation
-
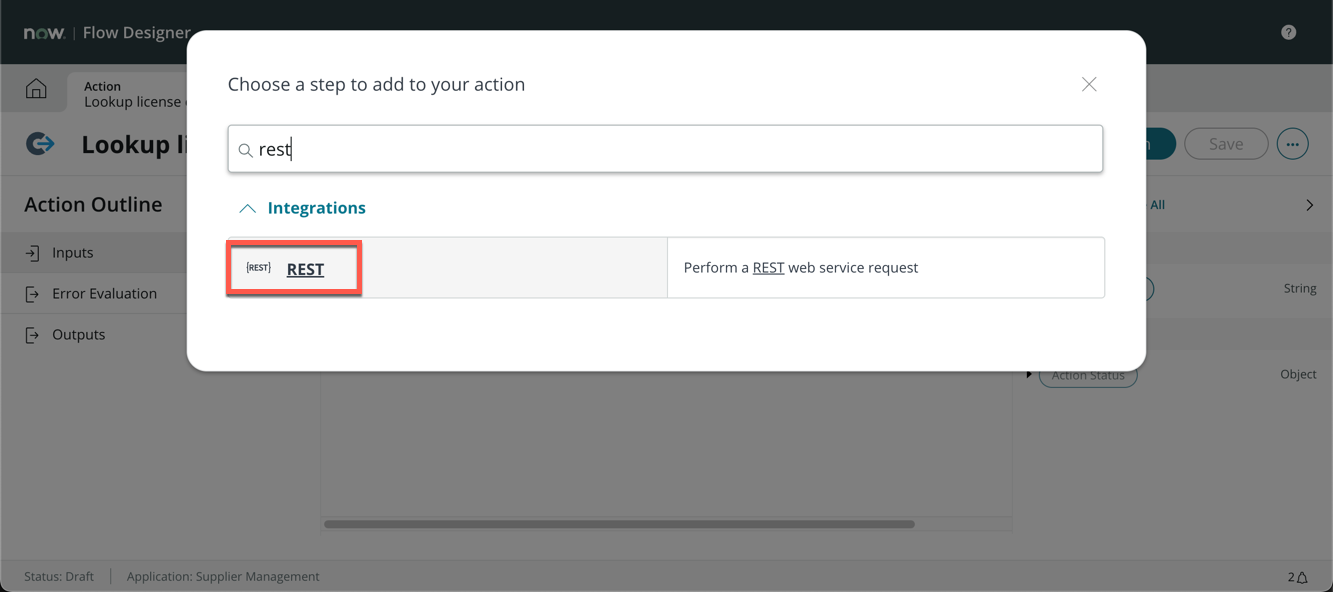
In the pop-up, search rest, and select the REST step
-
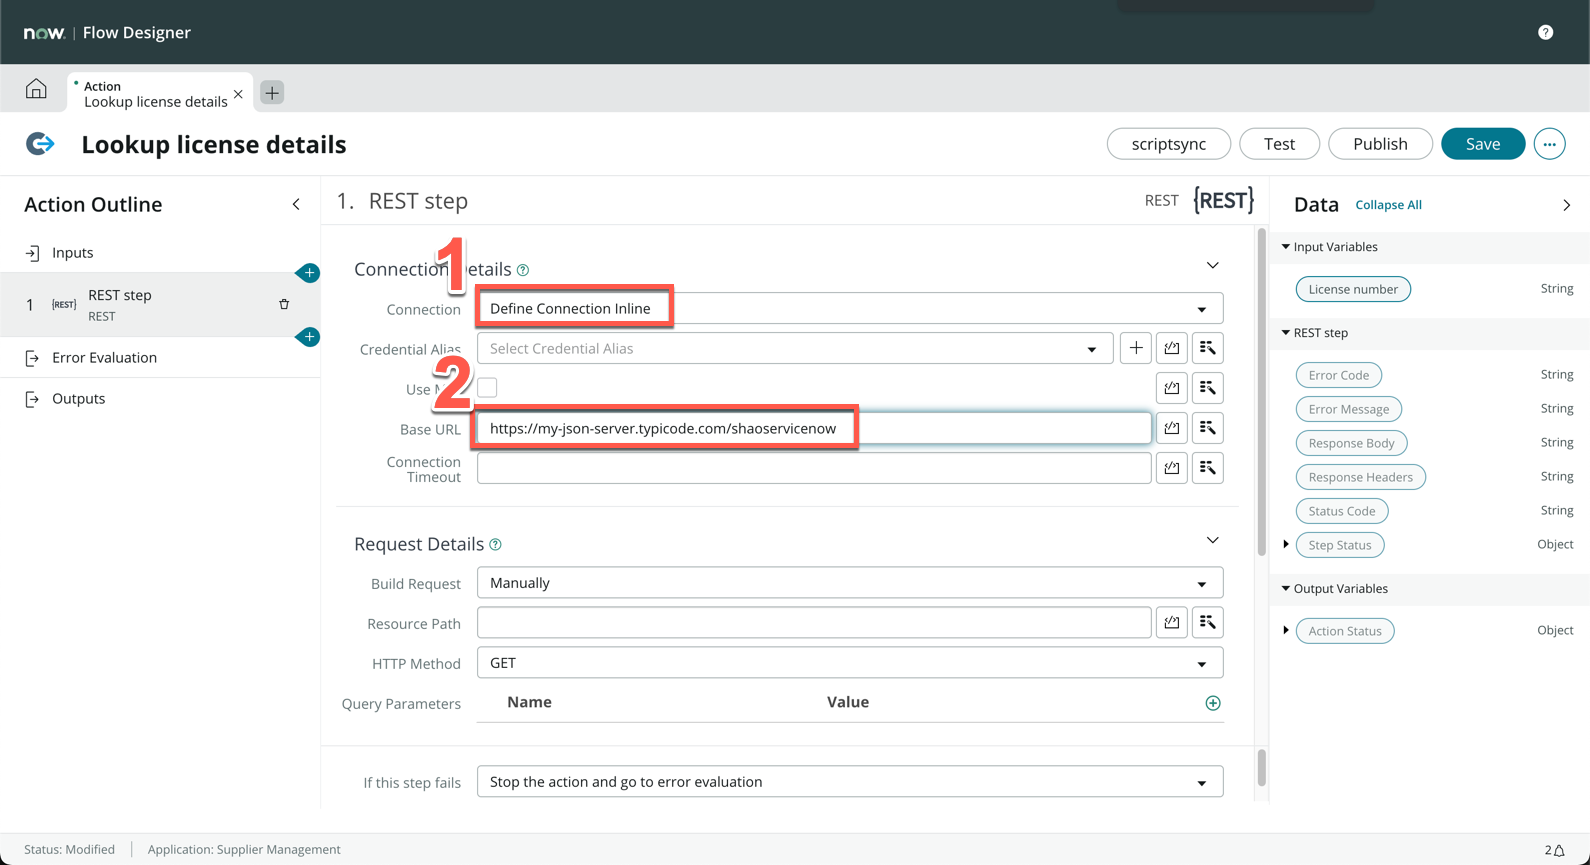
On the new REST step action screen, change Connection to Define Connection Inline (1)
-
Under Base URL, enter https://my-json-server.typicode.com/shaoservicenow (2)
Note: This is a mocked up API service that stores a database of license records
-
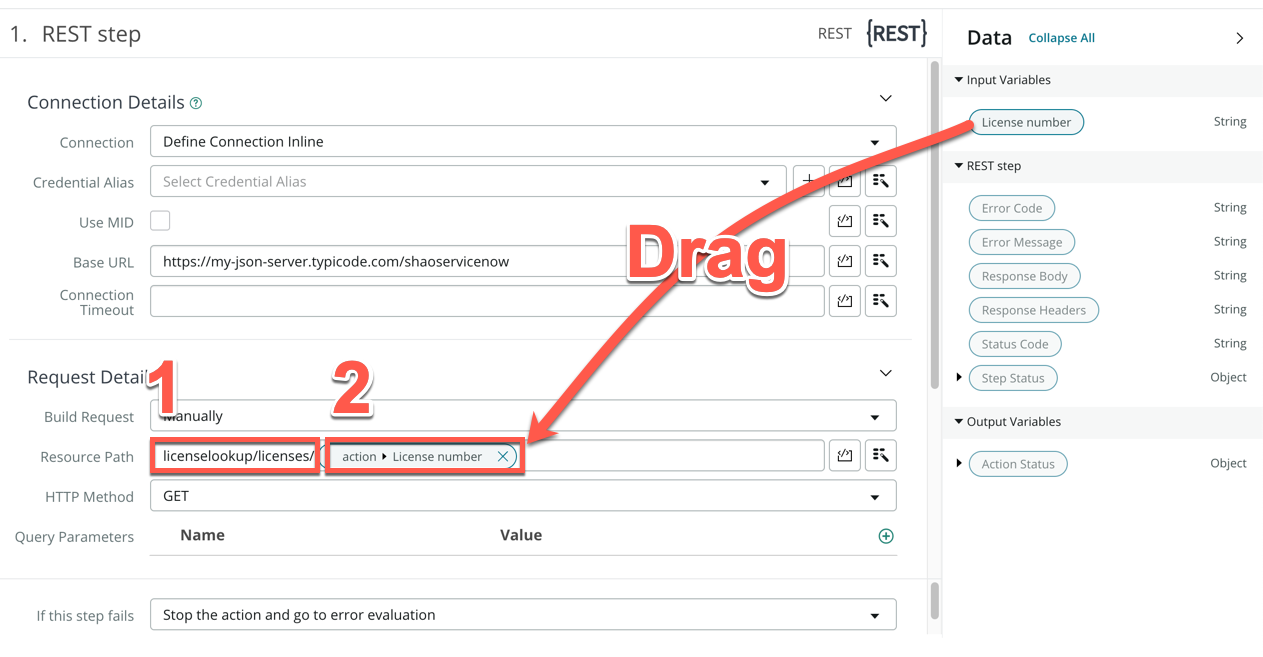
Under Resource Path, enter /licenselookup/licenses/ (1)
-
From the right Data panel, drag and drop the License number data pill onto the end of the string, after /licenselookup/licenses/ (2)
-
Click Save
-
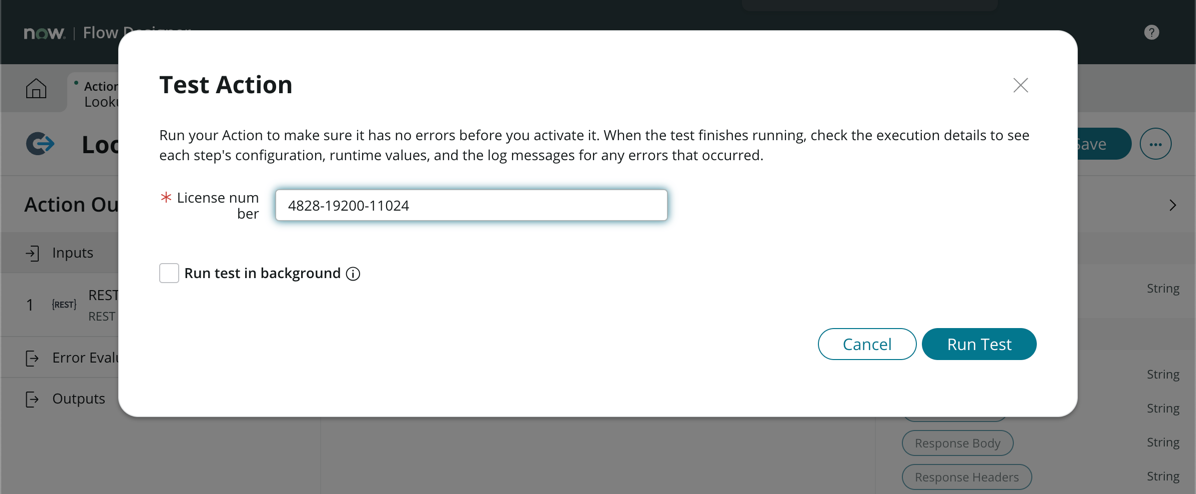
Click Test
-
In the pop-up modal, there should be one input field for License number as your defined in inputs. Enter the number 4828-19200-11024
-
Click Run Test
-
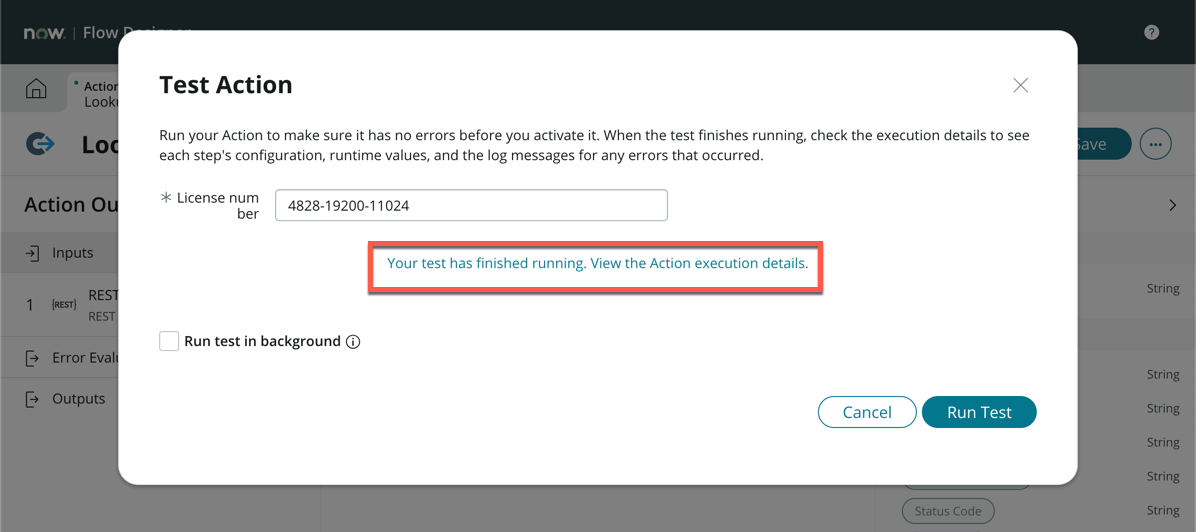
Once the processing is complete, click Your test has finished running. View the Action execution details.
-
You should be directed to the Execution Details tab
-
Scroll down and expand Steps
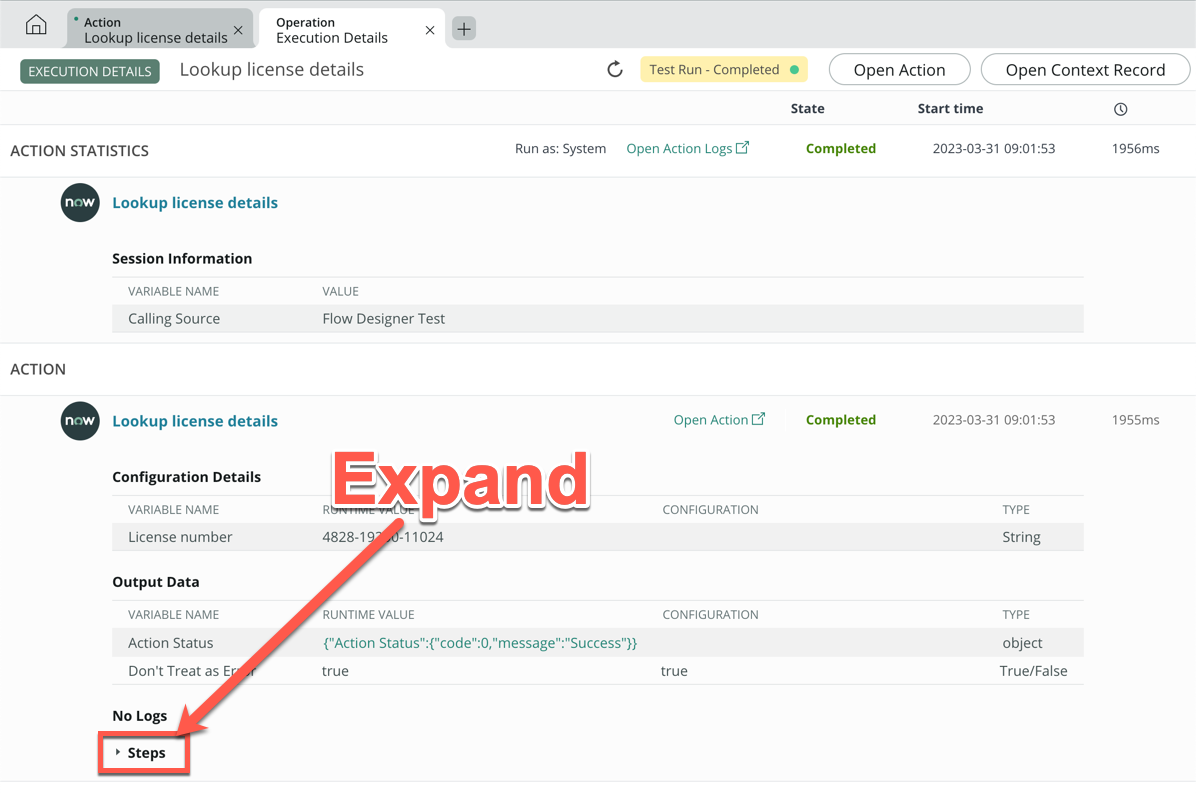
-
Scroll down until you see Response Body, then click on the return value
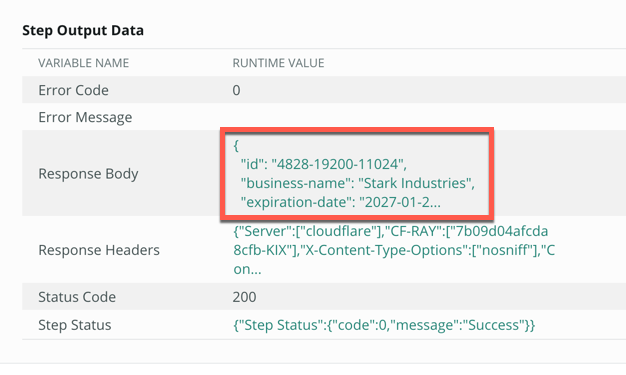
-
In the pop-up modal, select everything in the box and copy it to clipboard (Ctrl+c for PC or Cmd+c for Mac)
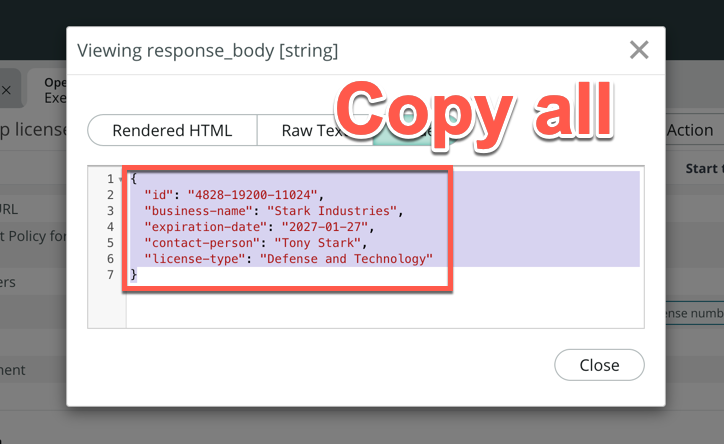
-
Close this pop-up
-
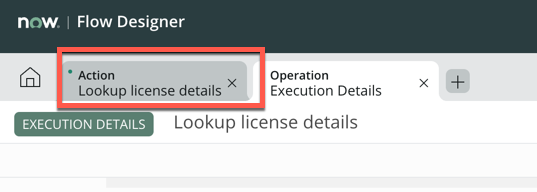
Return to the Lookup license details tab by clicking on it
-
Close the Test action pop-up
-
Click Add new step icon on the left side of the screen, in between REST step and Error Evaluation
-
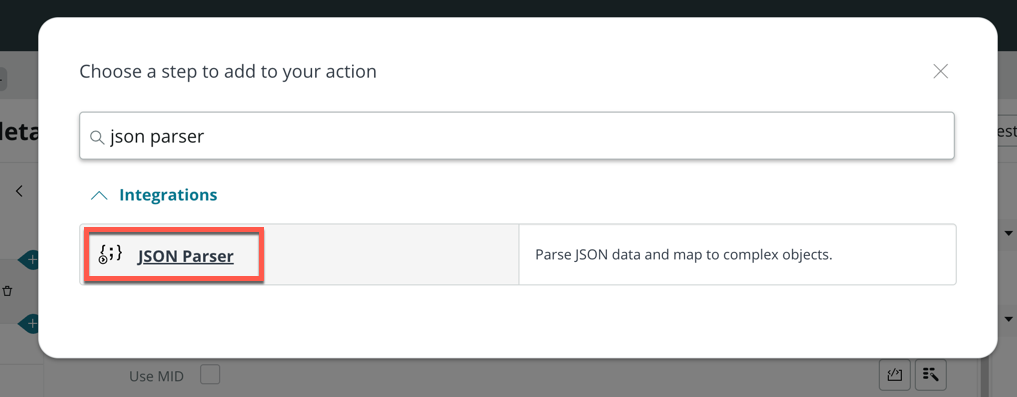
Search and click JSON Parser
-
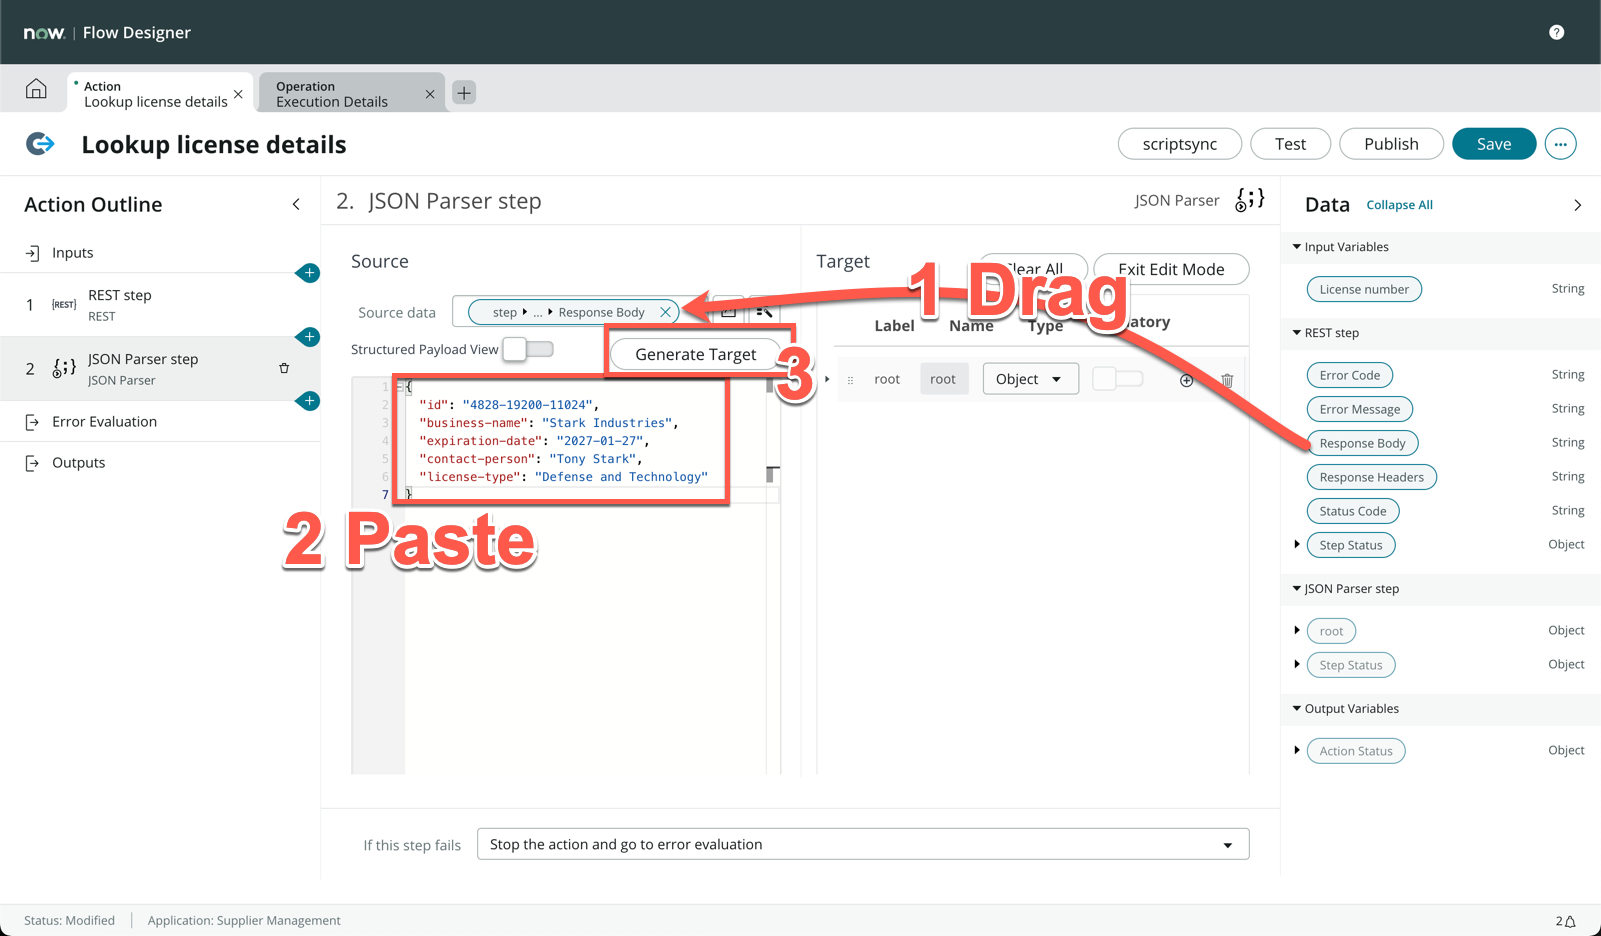
Drag and drop Response Body from the right sidebar onto Source data field (1)
-
In the main section, paste the JSON object you copied from earlier (2)
-
Click Generate Target (3)
-
Click Save on the top right of the screen
-
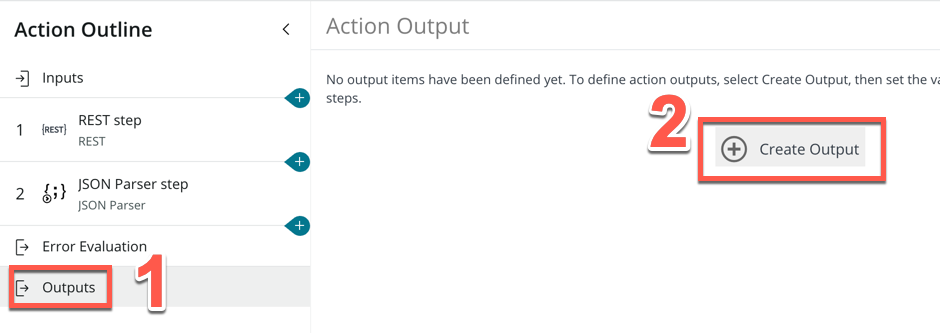
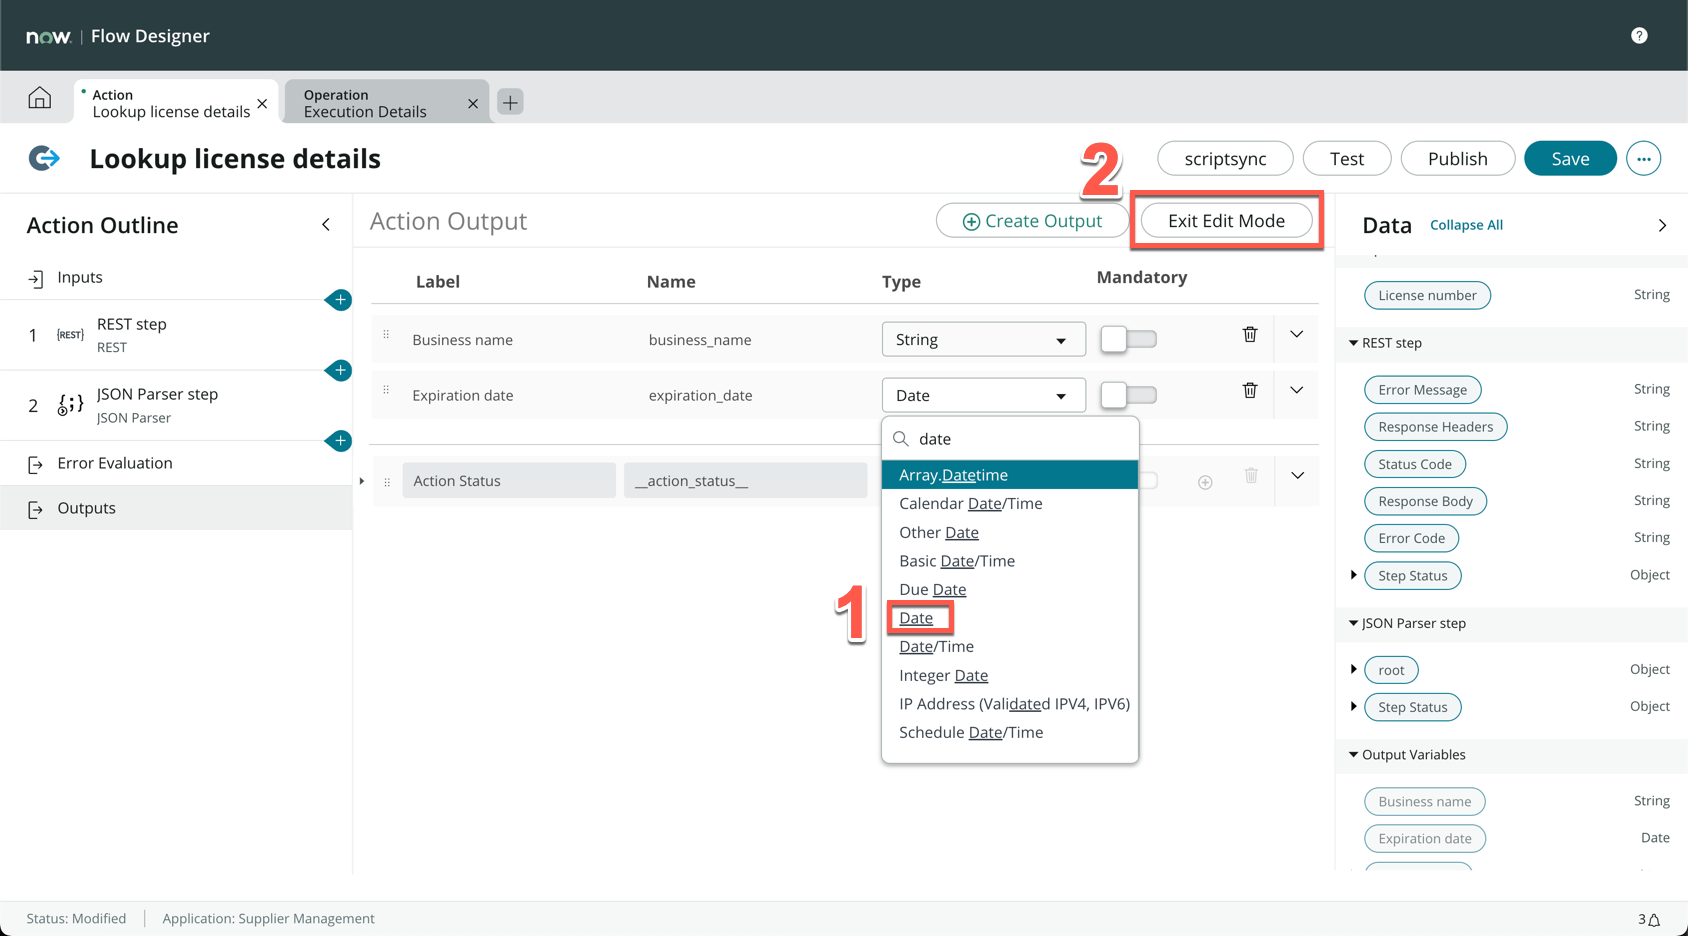
Click Outputs on the left of the screen (1)
-
Click Create Output (2)
-
Change the Label variable to Business name (1)
-
Change the Name variable to business_name (2)
-
Click Create Output
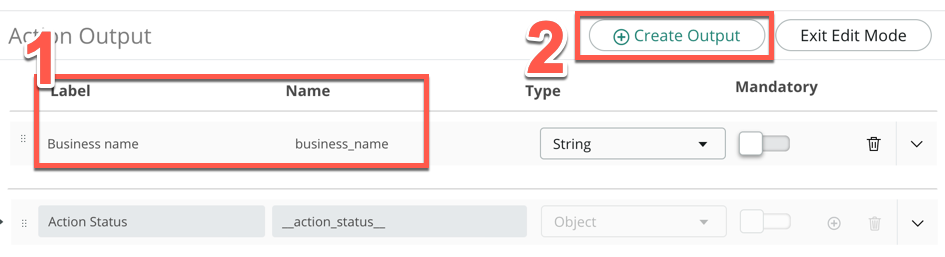
-
For the new output, Label is Expiration date and Name is expiration_date, change Type to Date (1)
-
Click Exit Edit Mode (2)
-
Expand the root data pill under JSON Parser step on the right sidebar
-
Drag and drop the business-name data pill onto the Business name field
-
Do the same again with expiration-date onto Expiration date field
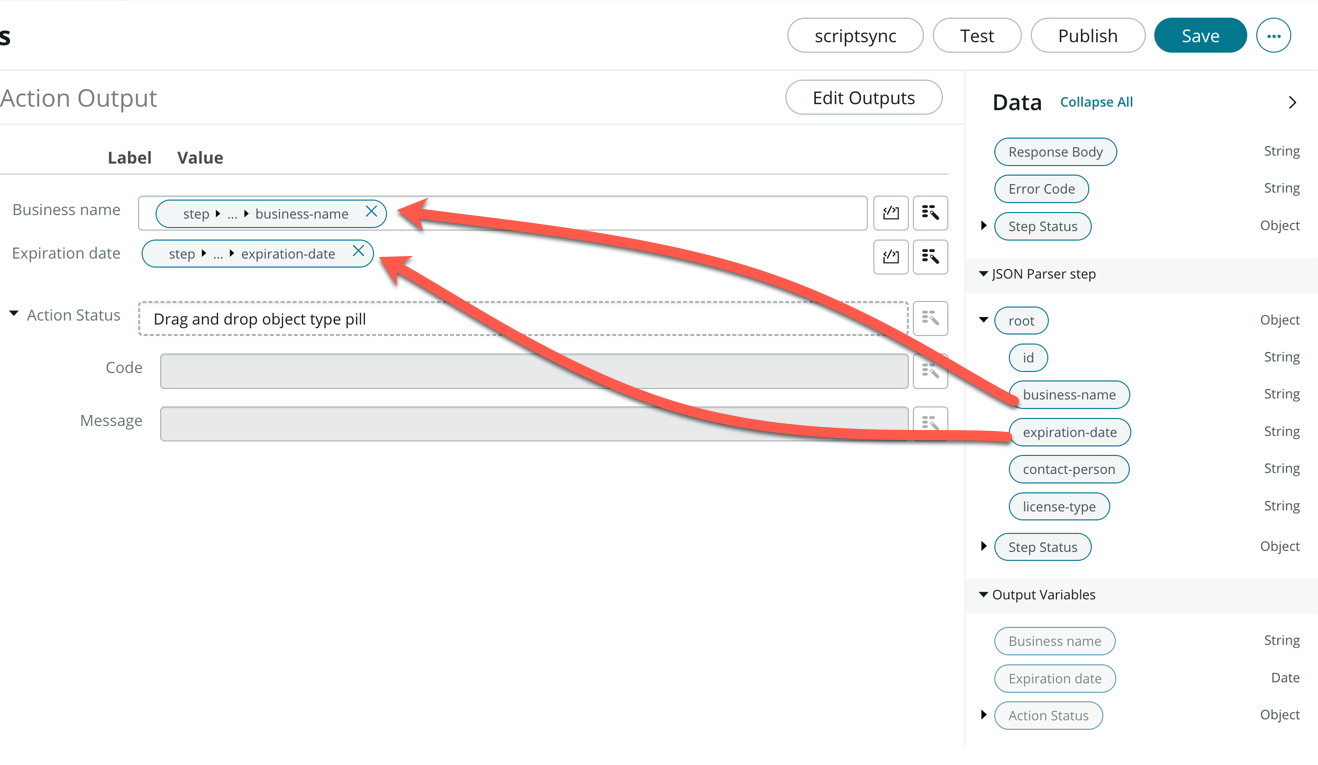
-
Click Save
-
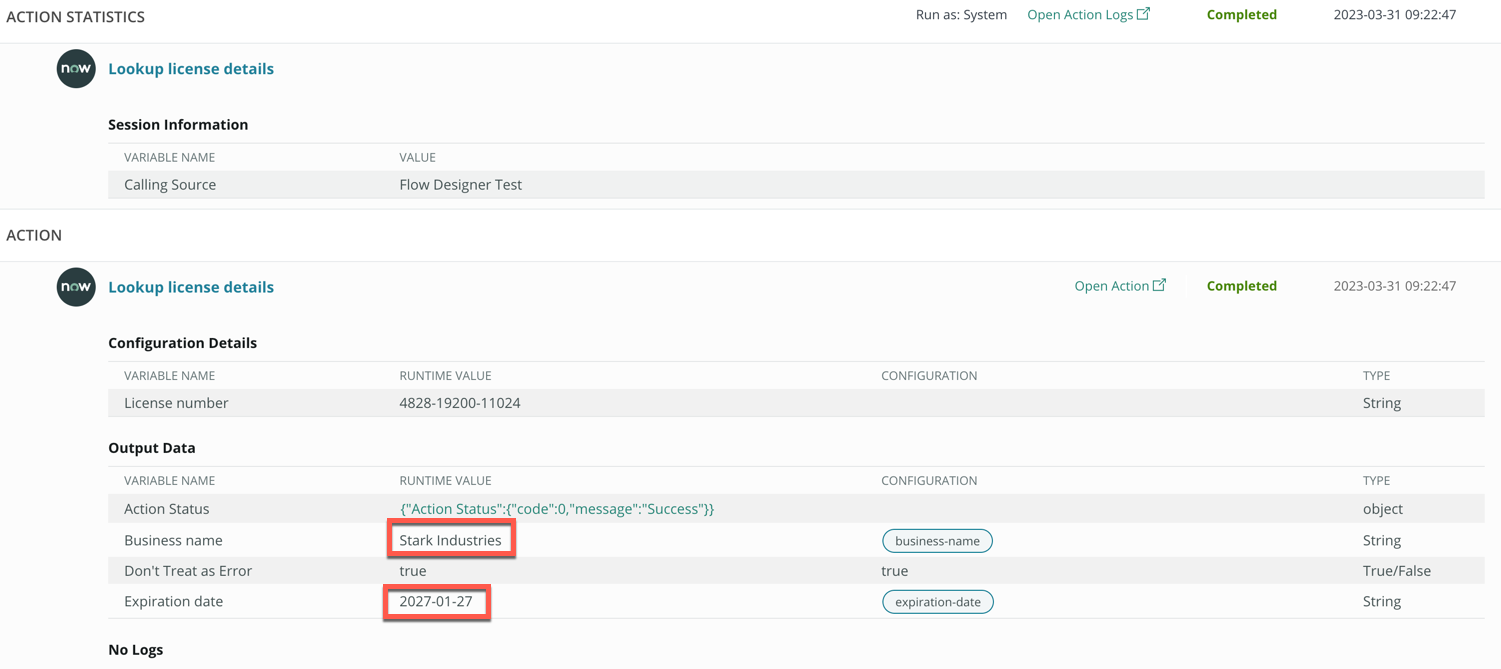
Click Test
-
Enter the license number 4828-19200-11024, then click Run Test
-
Click Your test has finished running. View the Action execution details.
-
In the Execution Details tab, do you see Business name and Expiration date populated under Output Data?
-
Navigate back to the Lookup license details tab
-
Close the Test Action pop-up
-
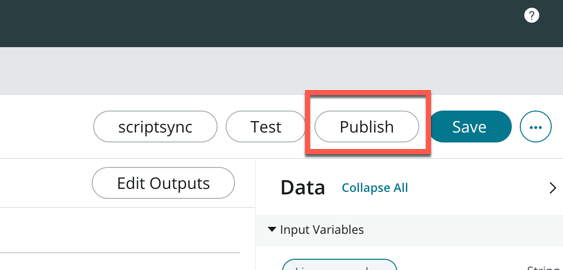
Click Publish
Create a flow to use the API action
-
Navigate back to App Engine Studio App Home
-
Click Add under Logic and automation
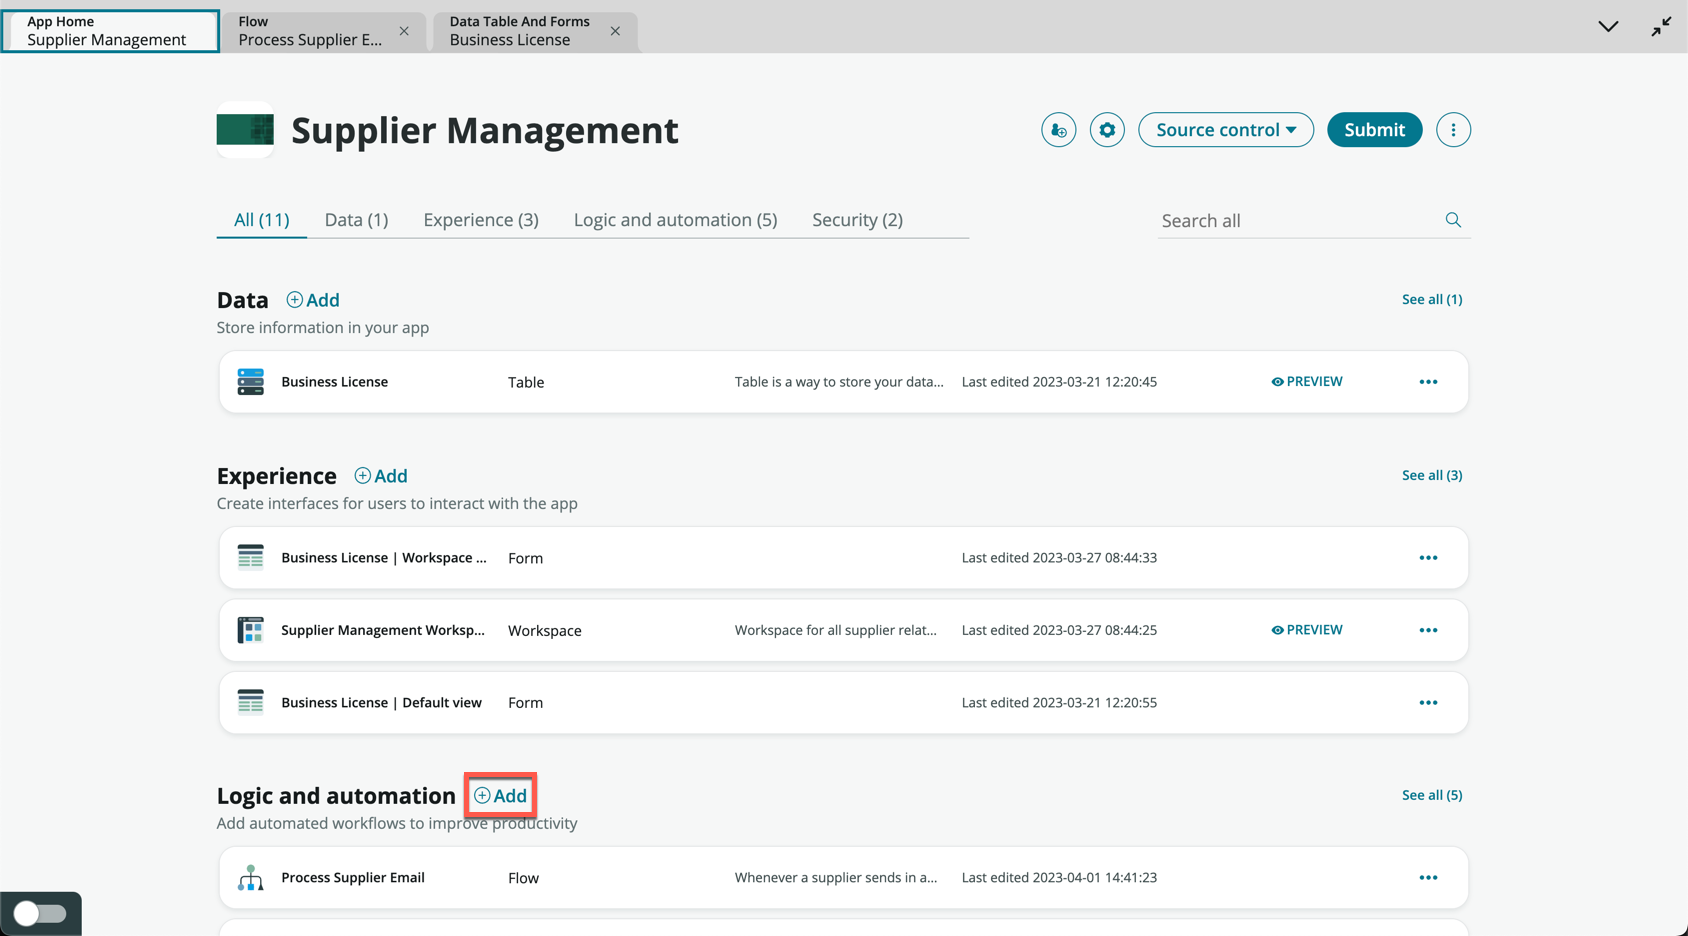
-
Click Flow
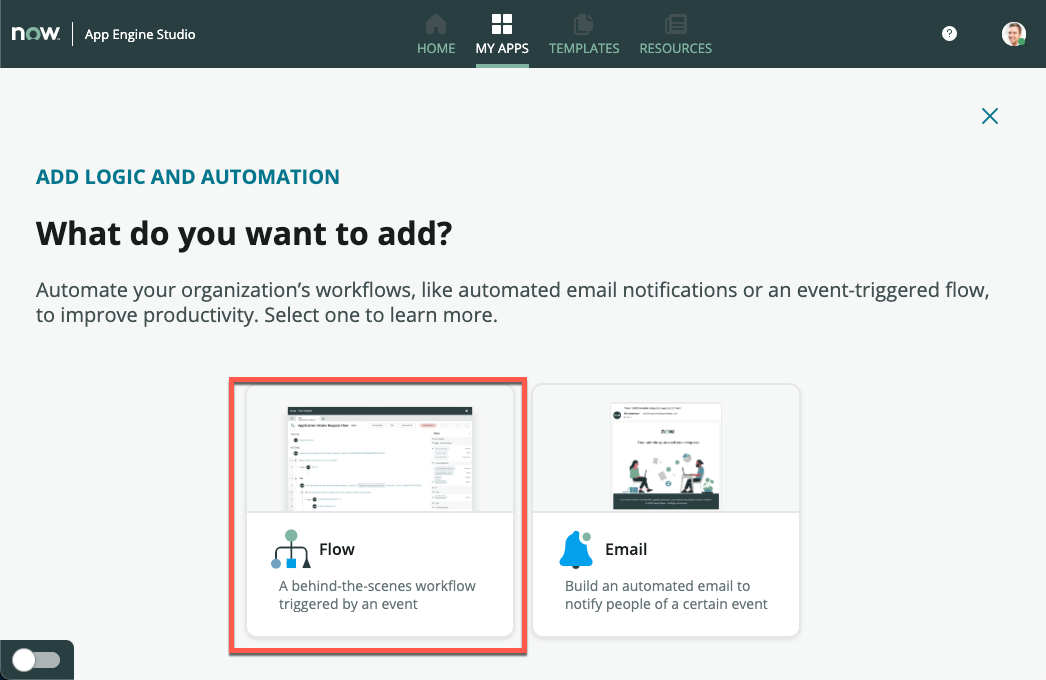
-
On the next screen, click Build from scratch
-
On the next screen form, under Name, enter Verify business license
-
Under Description, enter Call the business license lookup API to verify a supplier business license
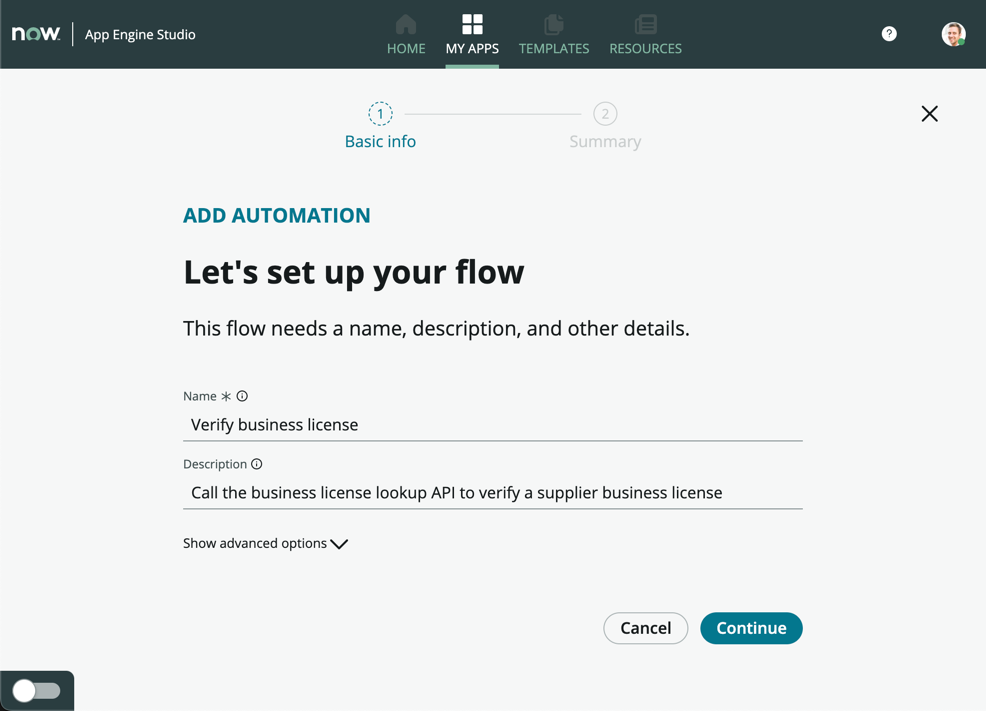
-
Click Continue
-
Once the flow has finished being created, click Edit this flow
-
Close the Getting Started pop-up, if it appears
-
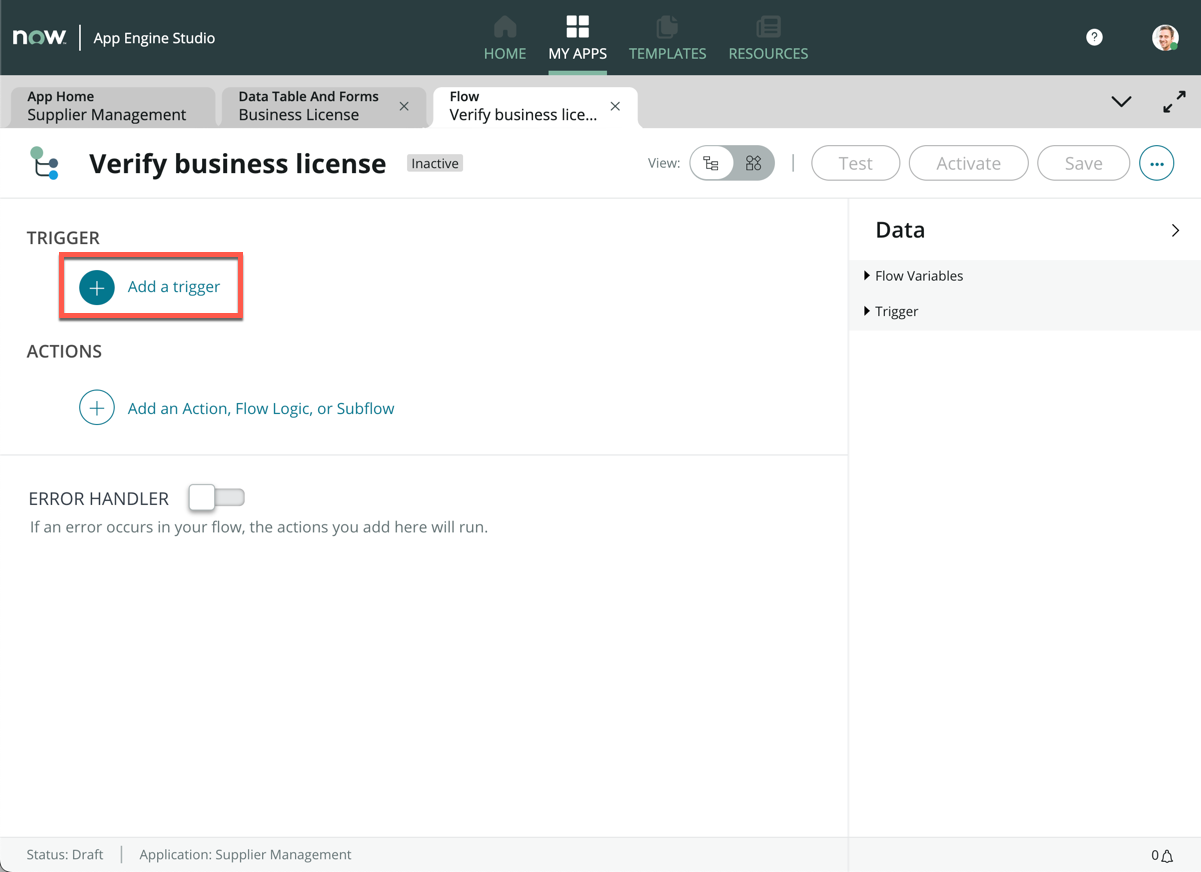
Click Add a trigger
-
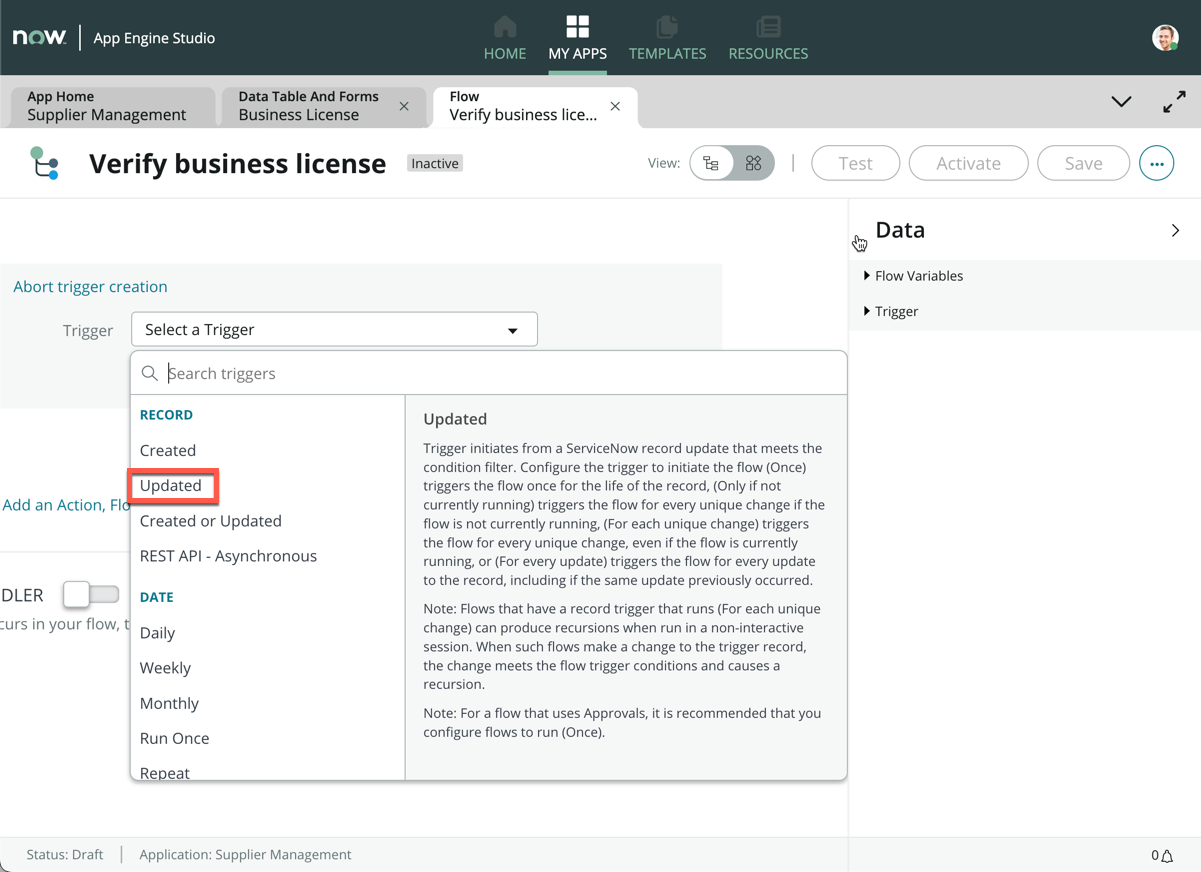
We want this flow to be triggered when a record on our Business License table is updated. Choose Updated under the Record section
Our trigger condition would be whenever Document Intelligence has processed a document as we saw in Exercise 2. This would be where the Business License Number has been extracted from the attachment.
-
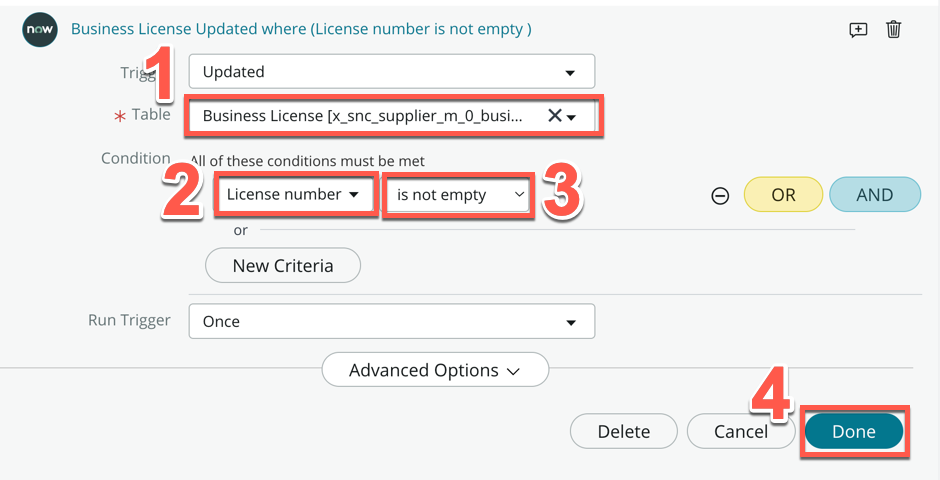
Search and select the Business License [x_snc_supplier_m_0_business_license] table under Table (1)
-
Click Add filters under Condition (2)
It’s important that this flow only runs when the Business License number has successfully been extracted from the license document by Document Intelligence. Add a condition to only run when the License number is not empty.
-
In field selection, select License number (2)
-
In operator, select is not empty (3)
-
Click Done (4)
-
Click Save on the top right (When working on a flow, save often!)
-
Click Add an Action, Flow Logic, or Subflow
-
Click Action
-
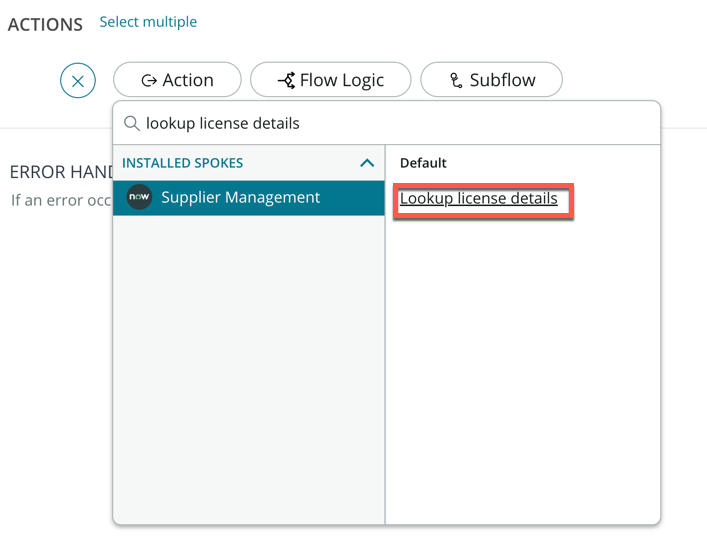
Search lookup license details
-
Click Lookup license details (this is the action we had just created)
-
From the right data panel, expand Business License Record, then drag and drop License number onto the License number field
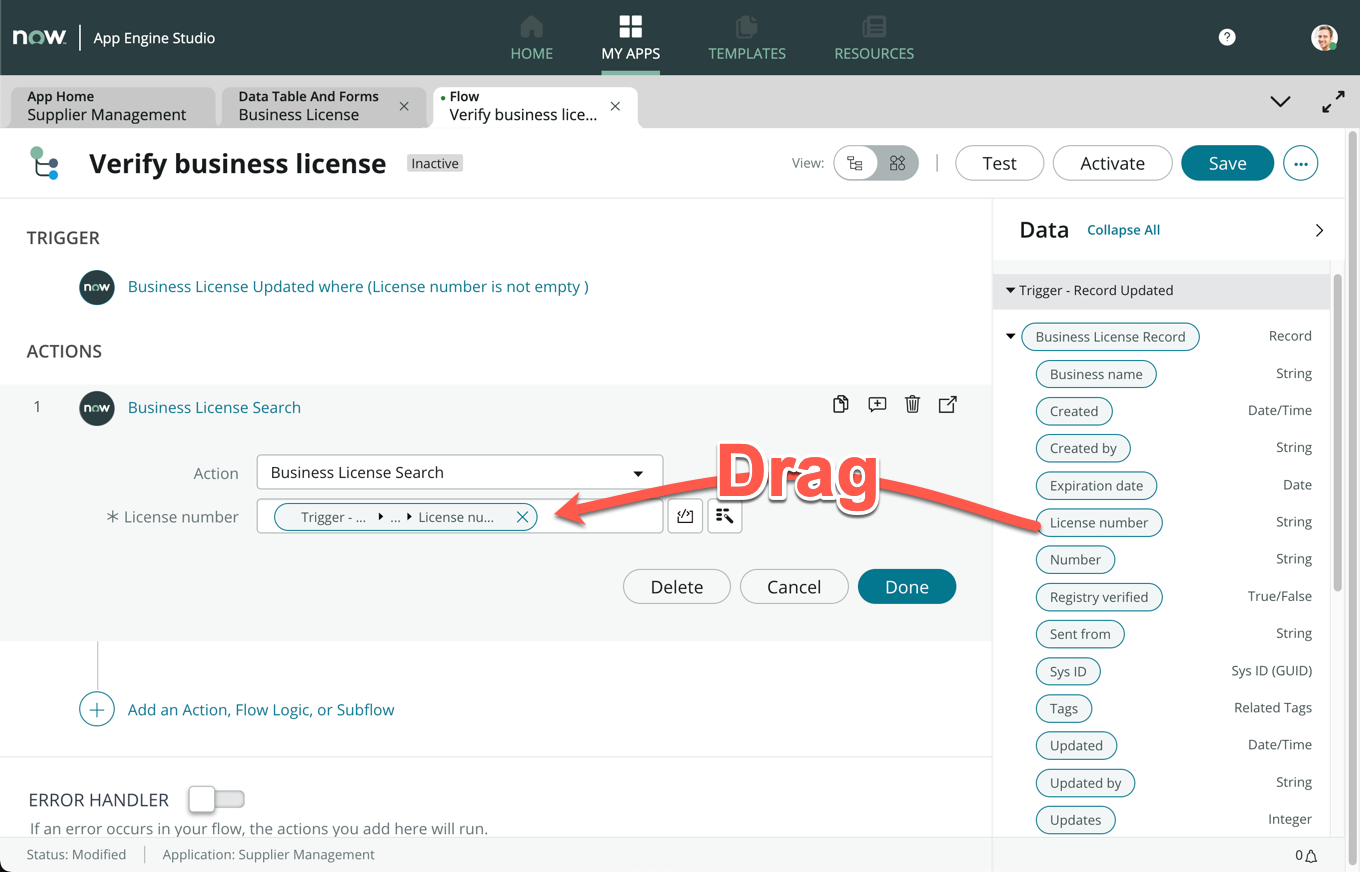
We are passing the license number from our Business License record into the API to retrieve information
-
Click Done
-
On the right data panel, examine the 1 - Lookup license details data section. The two outputs, Business name and Expiration date were our outputs defined from the API call we created
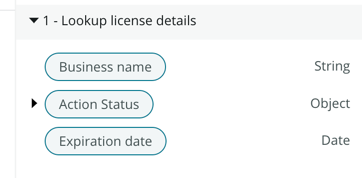
From these outputs we would like to validate back against the business license that the supplier submitted. This is meant to be illustrative, but you can continue to build additional verification logic if you choose.
-
Click Add an Action, Flow Logic, or Subflow
-
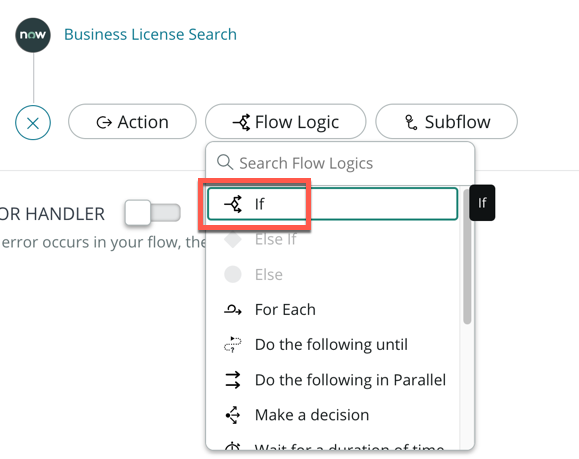
Cick Flow Logic, then click If
-
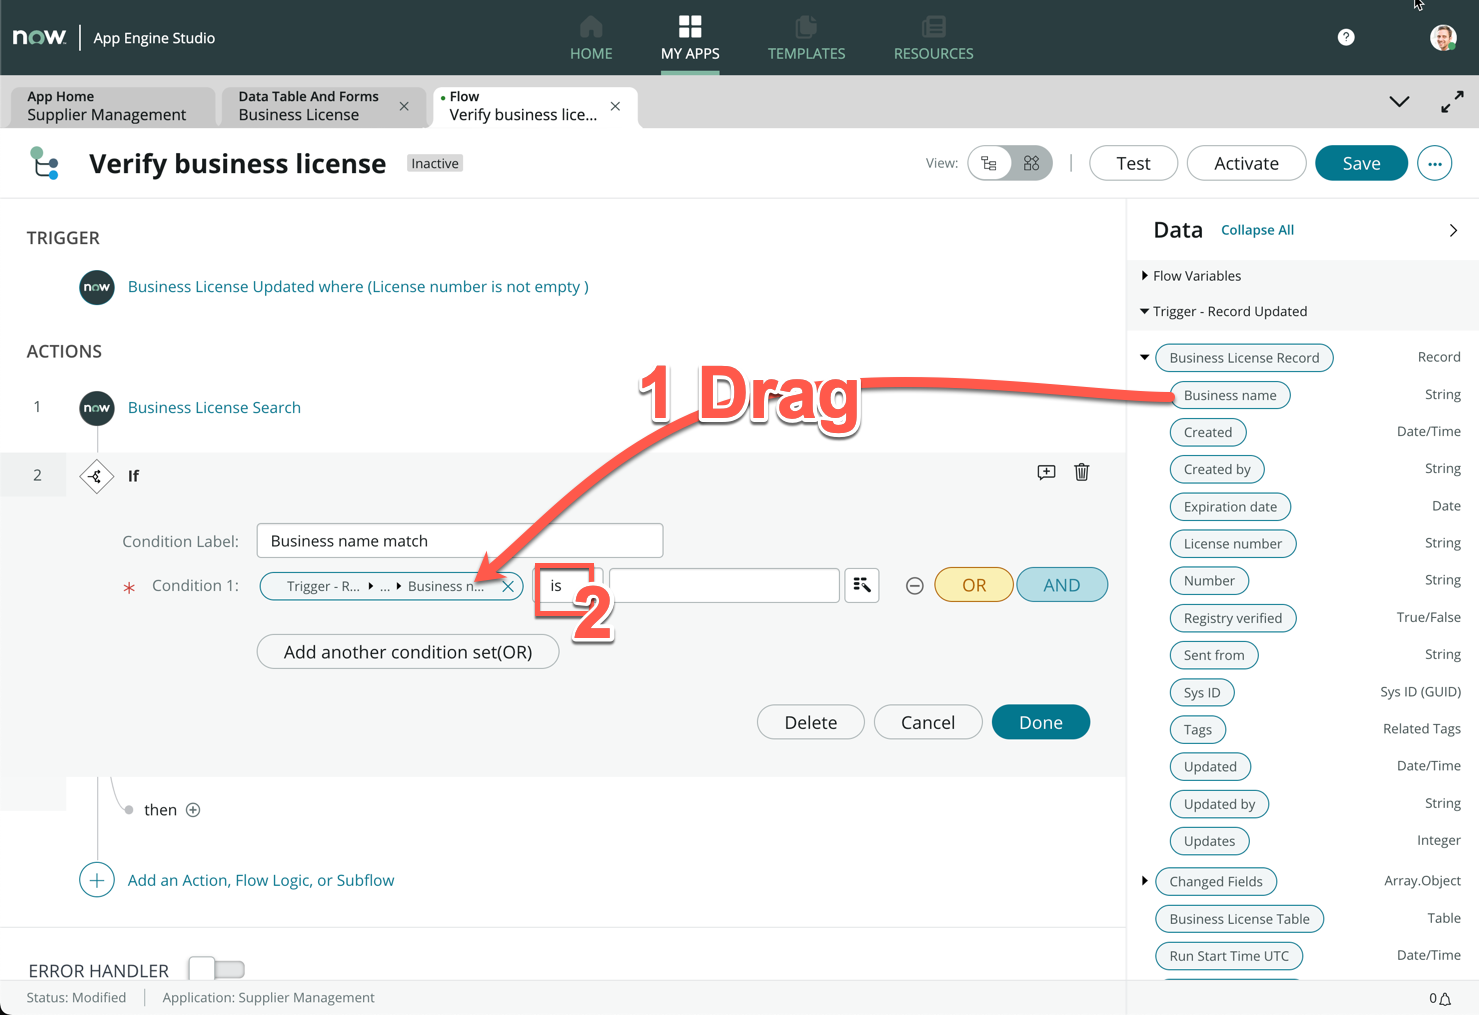
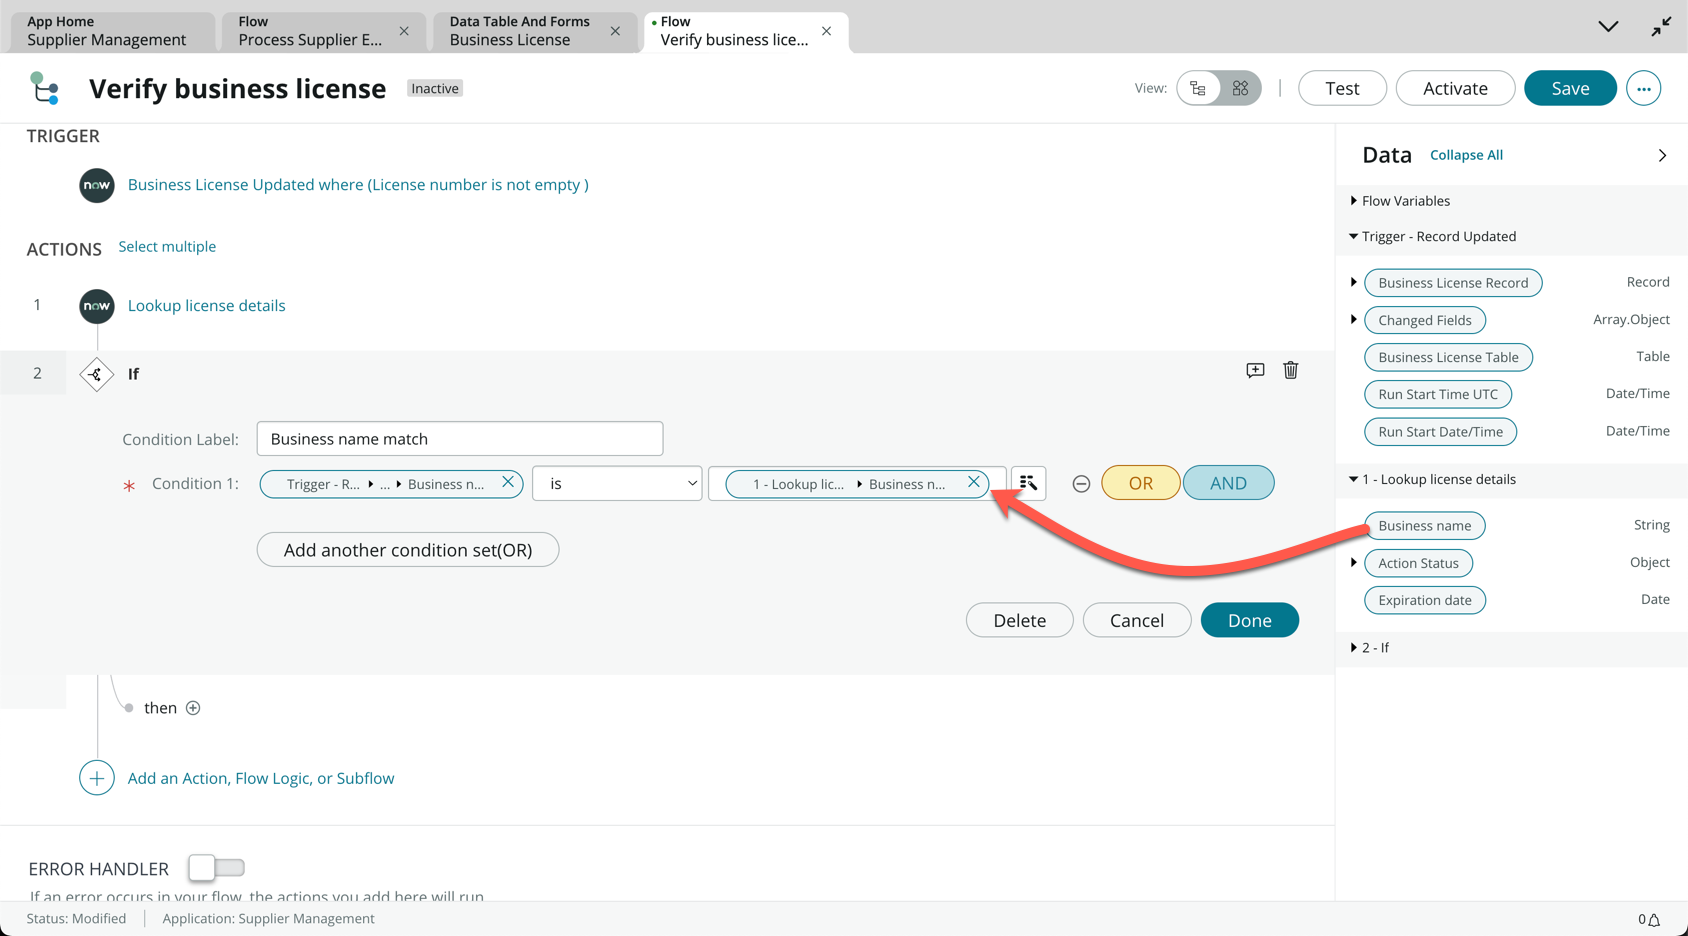
Under Condition Label, enter Business name match
-
Expand the Business License Record data pill, then drag and drop Business name data pill onto Condition 1 (1)
-
The operator should be left default as is (2)
-
From 1 - Business License Search, drag and drop the Business name data pill onto the next field
-
Click Done
-
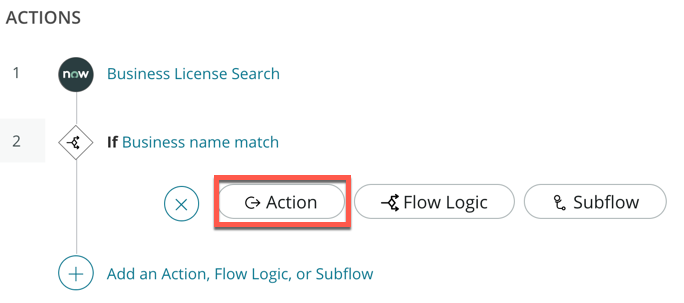
Under the If branch, click Action
-
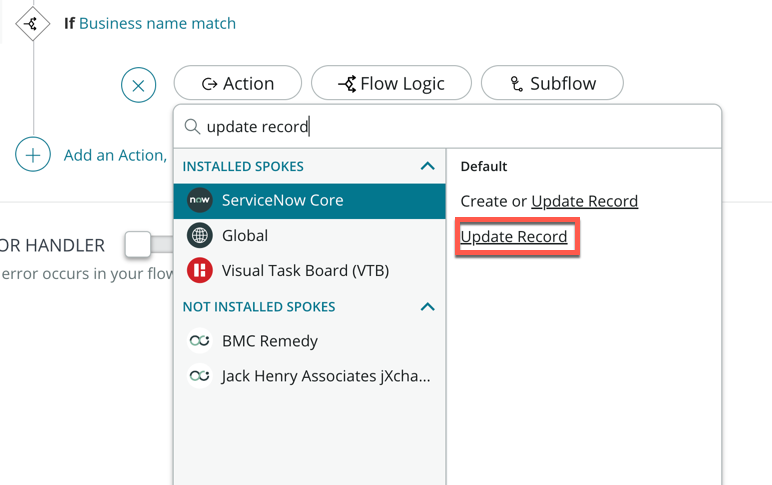
Search update record
-
Within the ServiceNow Core spoke, click Update Record
-
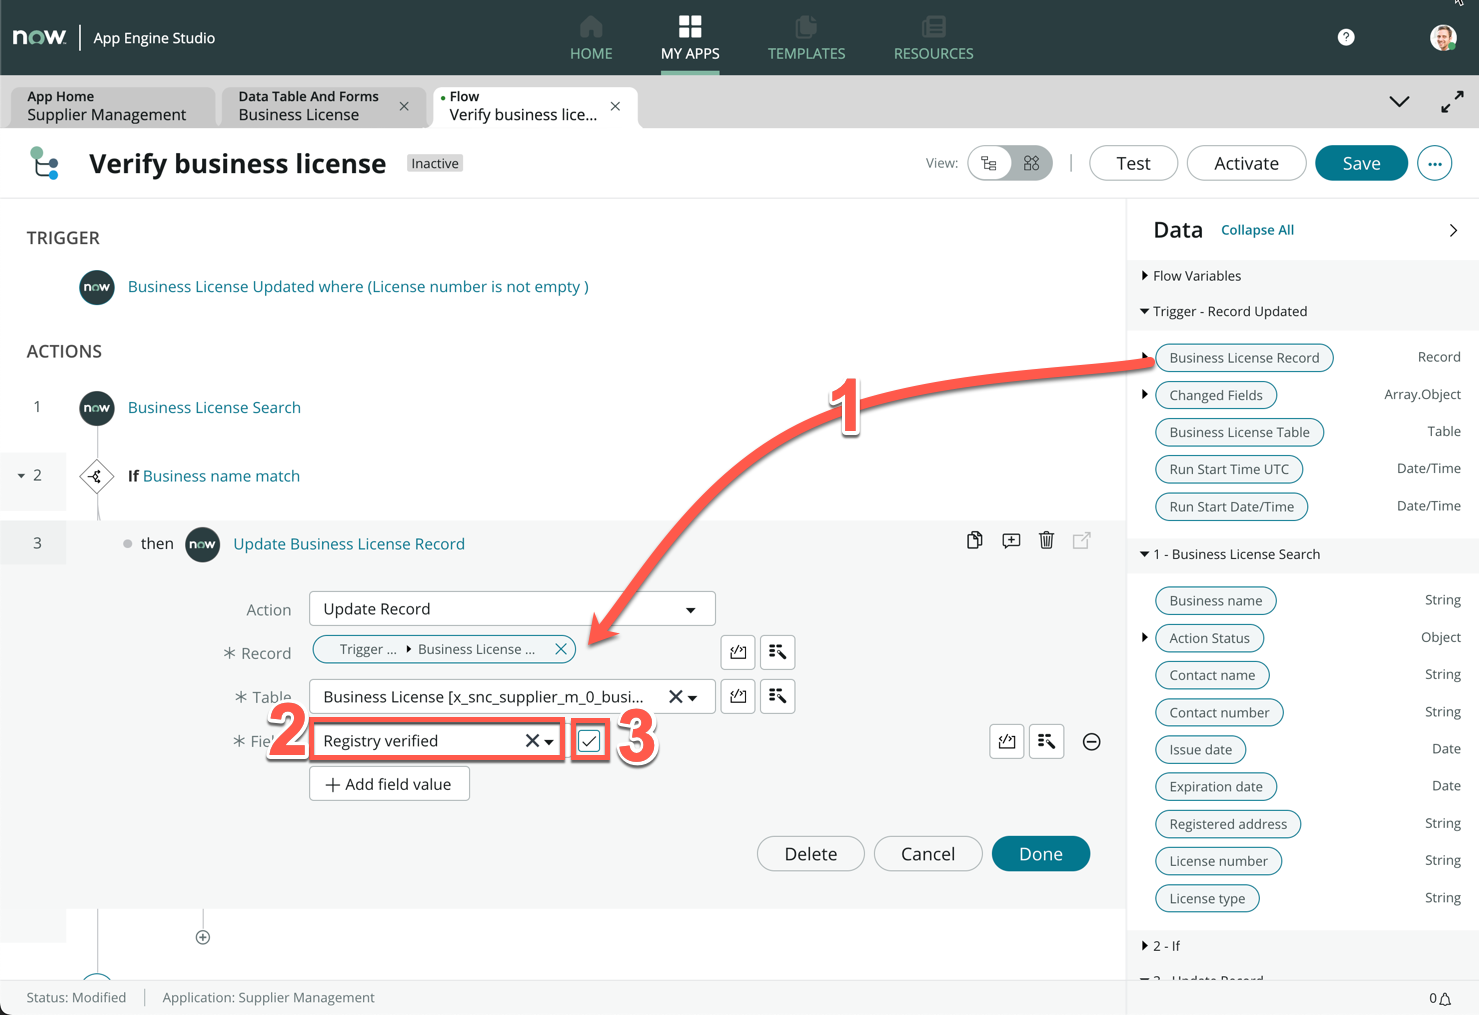
Drag and drop the Business License Record data pill onto Record (1)
-
Click Add field value
-
Search and select Registry verified (2)
-
Check the box next to the Registry verified field to mark as true (3)
-
Click Test on the top right of the page
-
In the pop-up, click and select record BSL001006
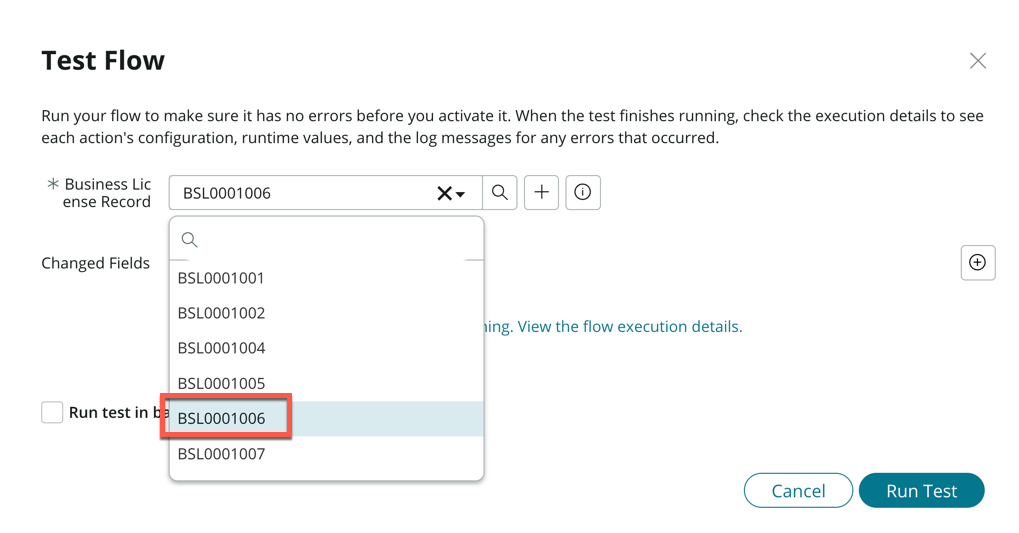
-
Click the information icon
-
Click Open Record
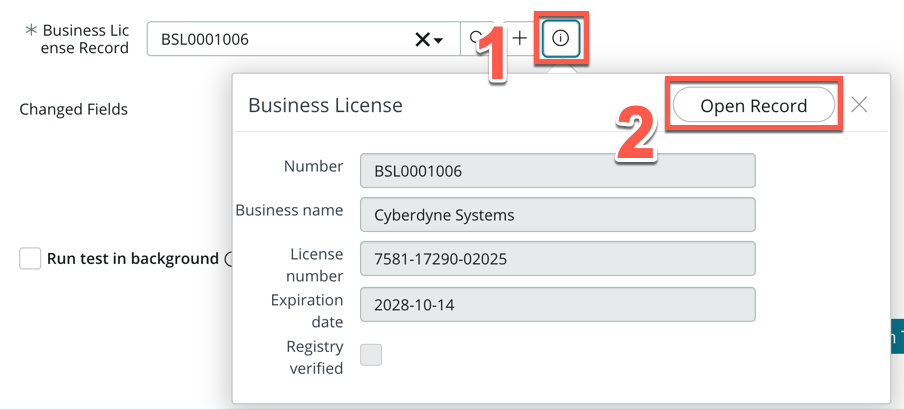
-
The record will open in a new browser page (The business name should be Cyberdyne Systems) Keep the page open
-
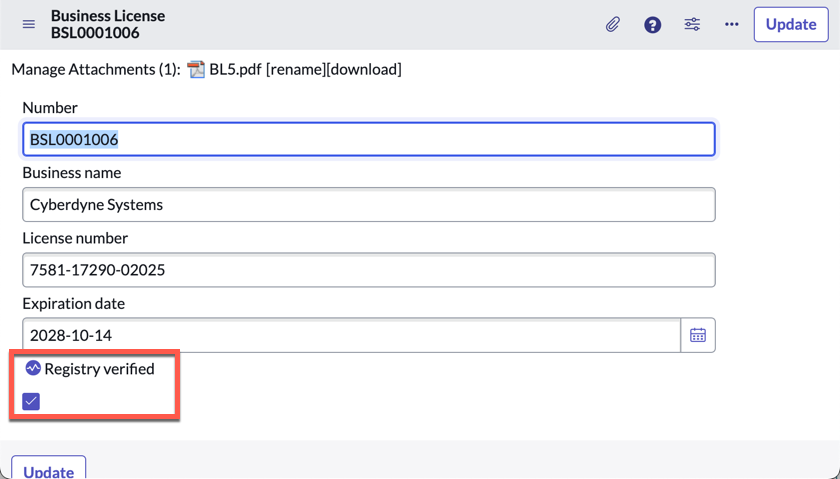
Back on the flow designer screen, click Run Test
-
Switch back to the Cyberdyne Systems record page
-
The Registry verified checkbox should change to true
-
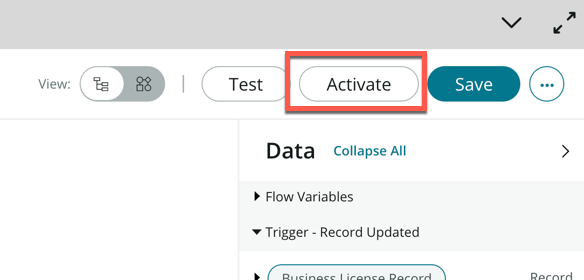
Switch back the the flow designer screen
-
Close the pop-up, and on the top right of the form, click Activate
Great job on making it to this point. In this exercise, we used a custom integration through Integration Hub to verify the business license. So far, we have successfully managed to automate the retrieval, extraction and verification of supplier business licenses without any manual intervention! What used to be a very repetitive, boring task, which took Nintech Co. hours of work each week is now an automated process that takes less than 2 mins. The Supplier Management team now has more time to focus on work that requires human creativity and personality, like Supplier Relationship Management and working with Suppliers to help meet Nintech Co. and their shared ESG goals.
Previous exercise Next exercise