Exercise 1: Creating tables for our travel request application
Duration: 20 minutes
Introduction
In the first section, we will create two tables. Our first table will be used to capture the Travel Requests coming in from employees, and our second table will be used to store all the major airports and cities that can be traveled to. We will assume that all Travel Requests will only be for air travel.
Let’s start
-
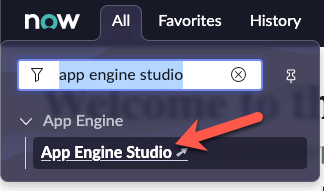
Click All, then search and click App Engine Studio
-
Click Create app on the top right of the screen

-
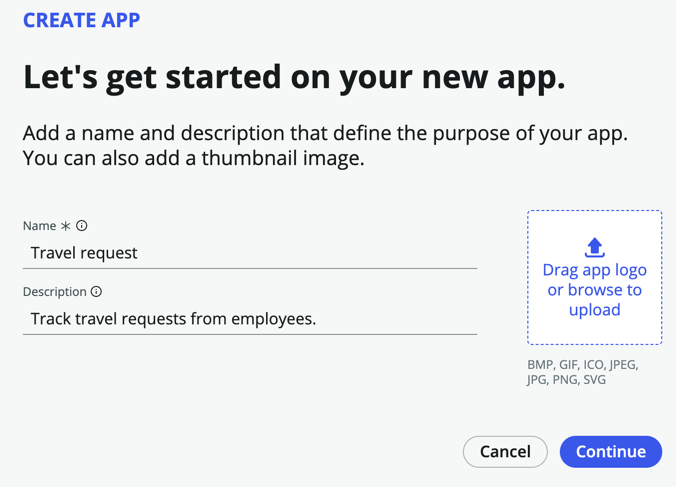
On the Create App page, name the app “Travel request”, and for description, enter “Track travel requests from employees.”
-
Click Continue
-
Leave the default roles - admin and user, and click Continue
-
Click Go to app dashboard
What you’ve just done is create a scoped application. Scope uniquely identifies every application file, why is this important?
- Scope protects an application, its files, and its data from conflicts with other applications.
- Scope determines which parts of an application are available for use by other applications in ServiceNow.
- Scope allows developers to configure which parts of their application can be acted on by other applications.
- Scope prevents work done in the main ServiceNow browser window (not in Studio) from becoming part of an application’s files.
- Without Scope, it will be very difficult to govern new applications!
Create a Travel Request table
We will now create a table to capture the travel requests.
-
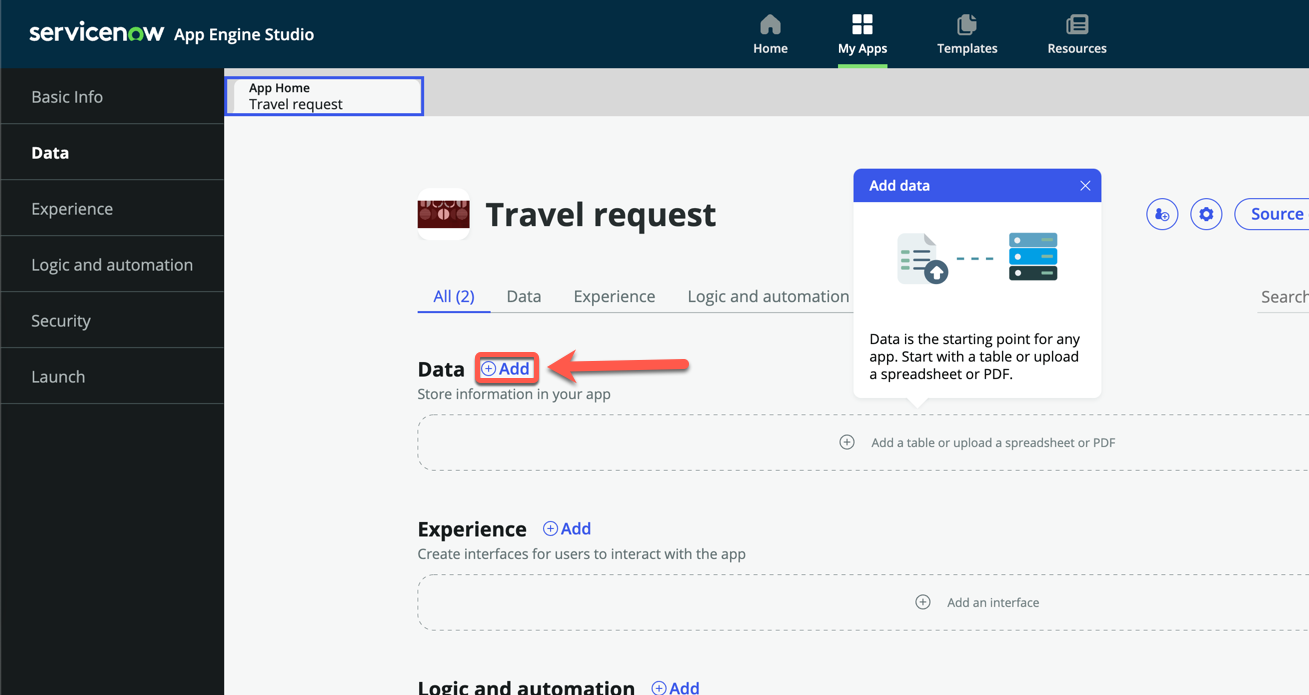
Under Data, click Add
-
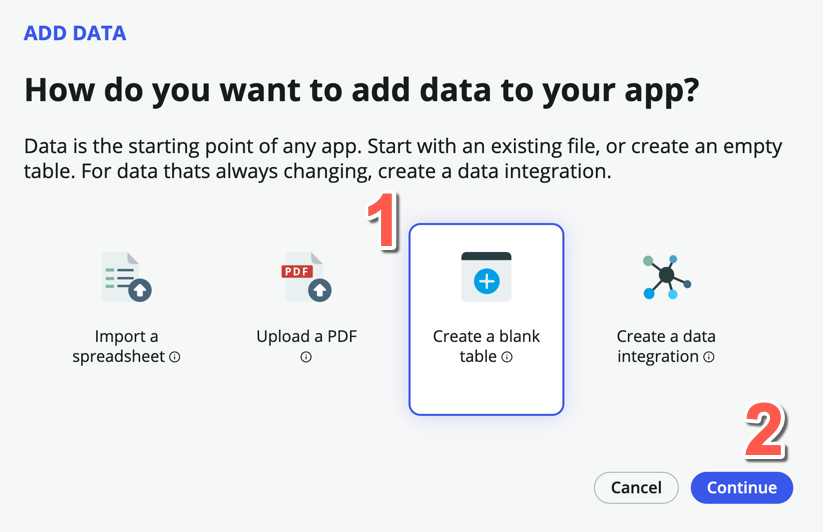
On the Add Data page, click Create a blank table
-
Click Continue
-
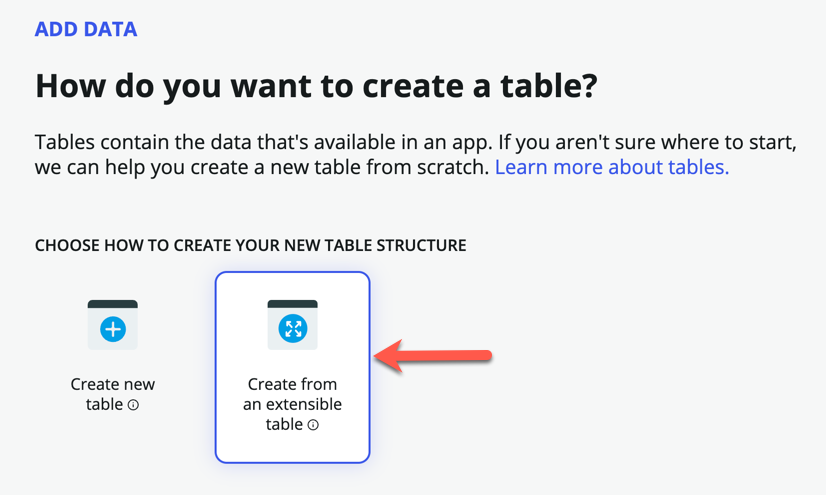
On the next page, select Create from an extensible table
-
Click Continue
-
On the next page, click Table, and select Task under Recommended Tables
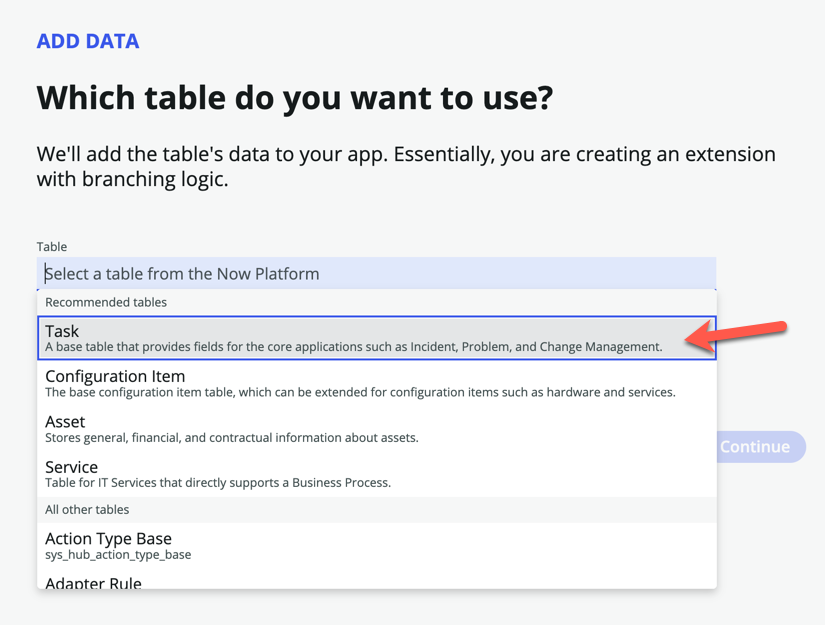
The task table is one of the core tables provided on the platform. Any table that extends task can take advantage of task-specific functionality such as SLAs and Approvals. This speeds up the overall process and ease of building logic and functionality.
-
Click Continue
-
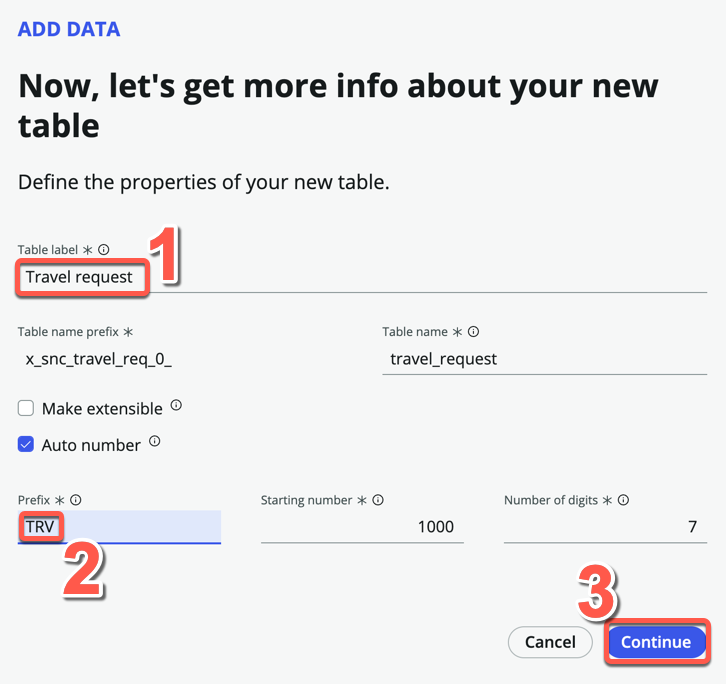
For Table label, enter Travel request. Table name should be auto-populated.
-
Check Auto number
-
For Prefix, enter TRV
-
Click Continue
-
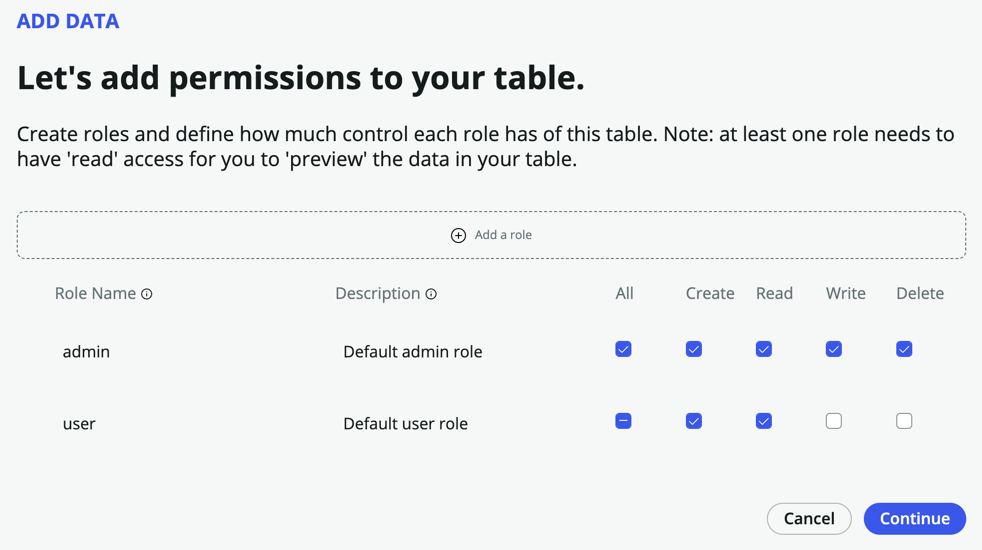
Allow all access for admin and Create and Read access for user
-
Click Continue
-
Click Edit table
-
If presented with the Welcome to Table builder pop-up, read through the steps, then close it
-
You should now be on the Table Builder interface, in the Spreadsheet view
Instead of adding fields individually via table builder, we will add fields directly onto the form view instead. But note that there are several ways to add fields to a table.
-
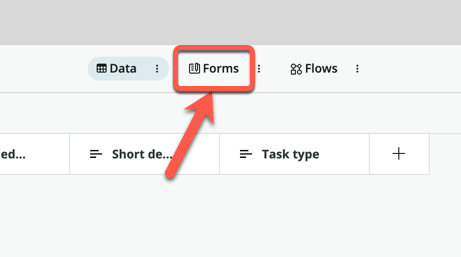
Click on the Forms pill
-
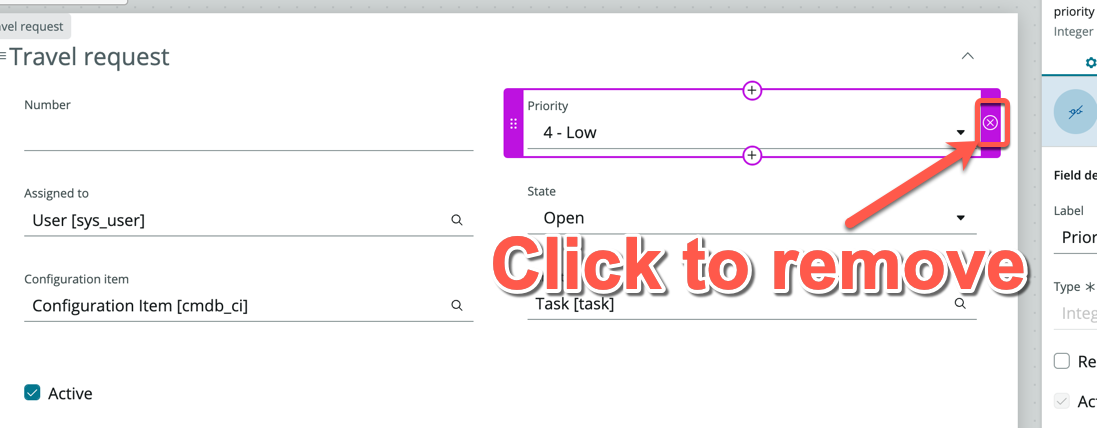
The current form layout is inherited from the task table, we will only keep the fields relevant to us
- Remove the following fields from the form:
- Priority
- Assigned to
- Configuration item
- Parent
-
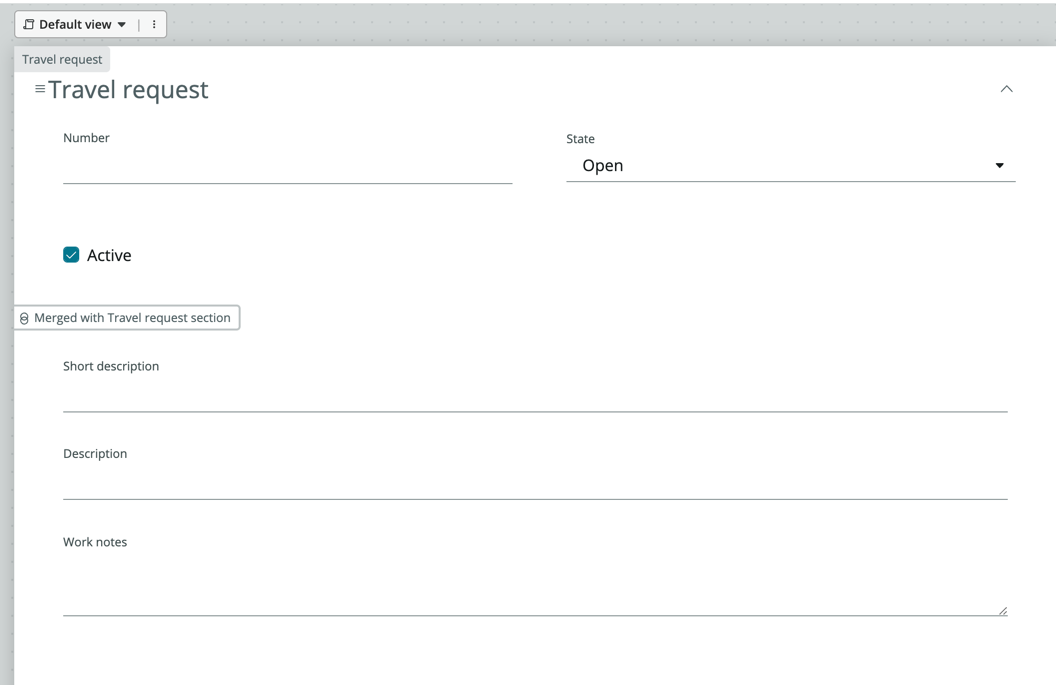
The form should look like this
-
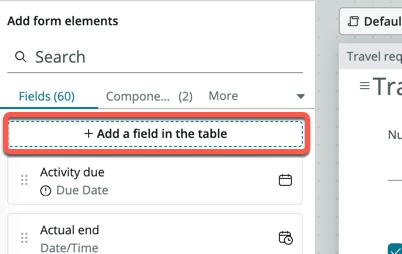
On the left panel, click Add a field in the table
-
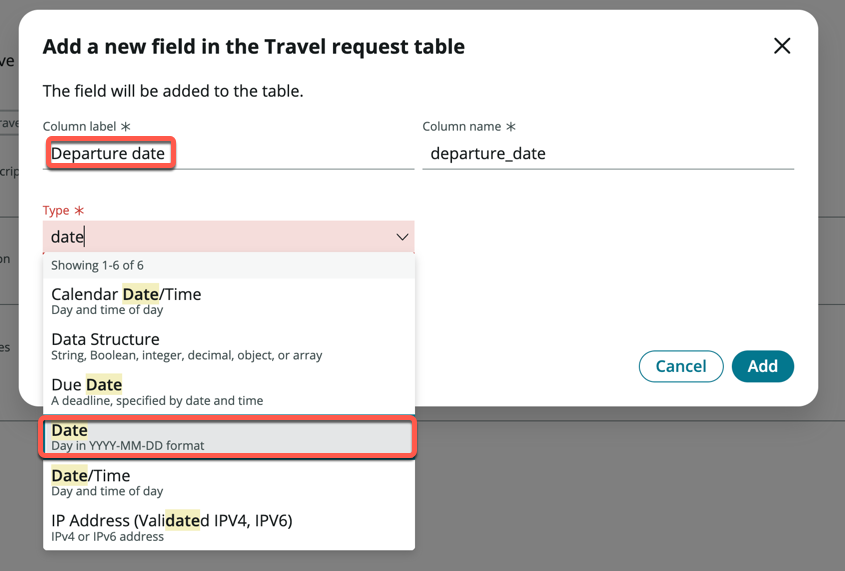
On the pop-up modal, enter Departure date under Column label, the Column name should be auto-populated
-
Change Type to Date
-
Click Add
-
Click Add another one
-
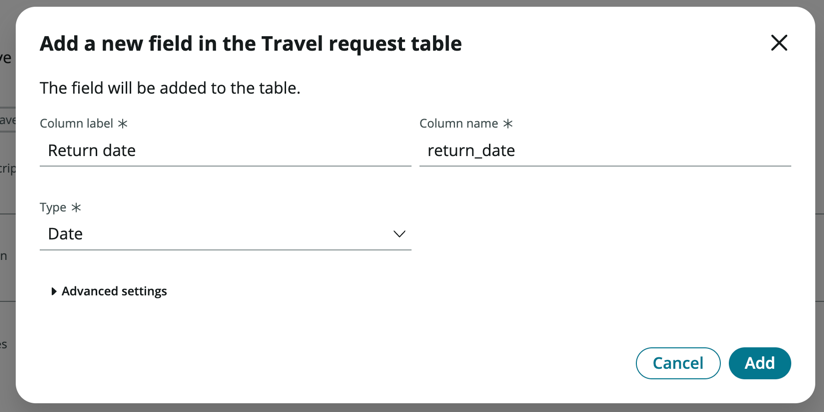
Enter Return date under Column label, the Column name should be auto-populated
-
Change Type to Date
-
Click Add
-
Click Add another one
-
Repeat the steps above for the following 2 fields:
Column label Type Number of days Integer Reason for travel Choice -
The panel on the left should show 4 new fields with a purple highlight
-
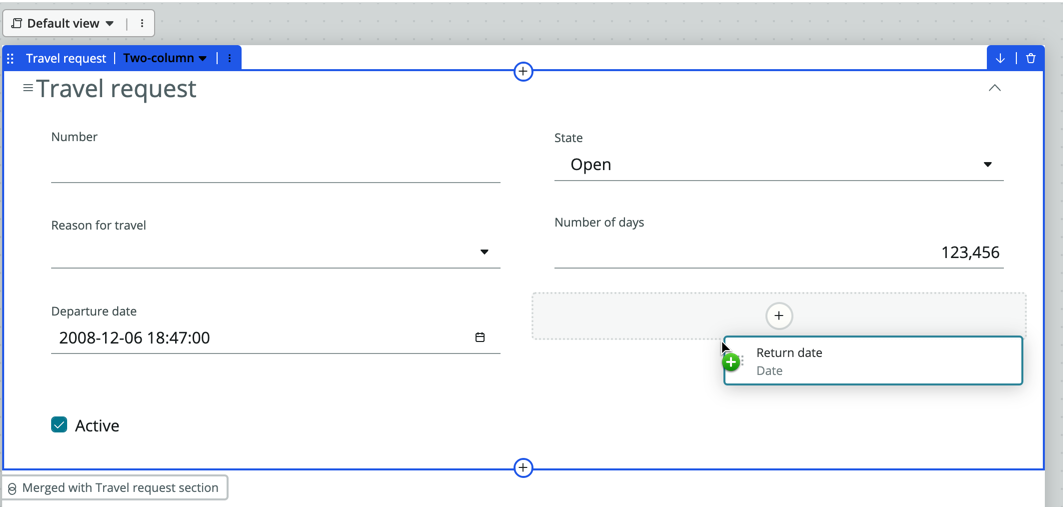
Drag and drop those 4 fields onto the form
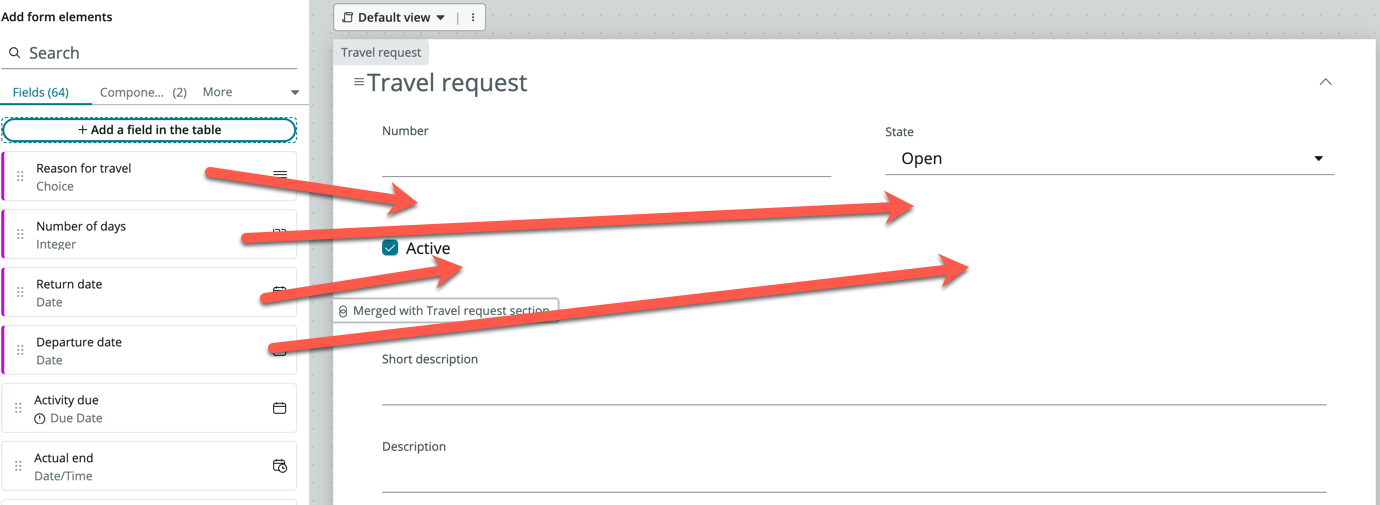
Tip: You will need to ensure that you see a grey outline box with a plus icon before releasing the field
-
Search and add two more standard fields onto the form: Opened by, Approval (These come standard with the Task table)
-
Click Save on the top right of the form
-
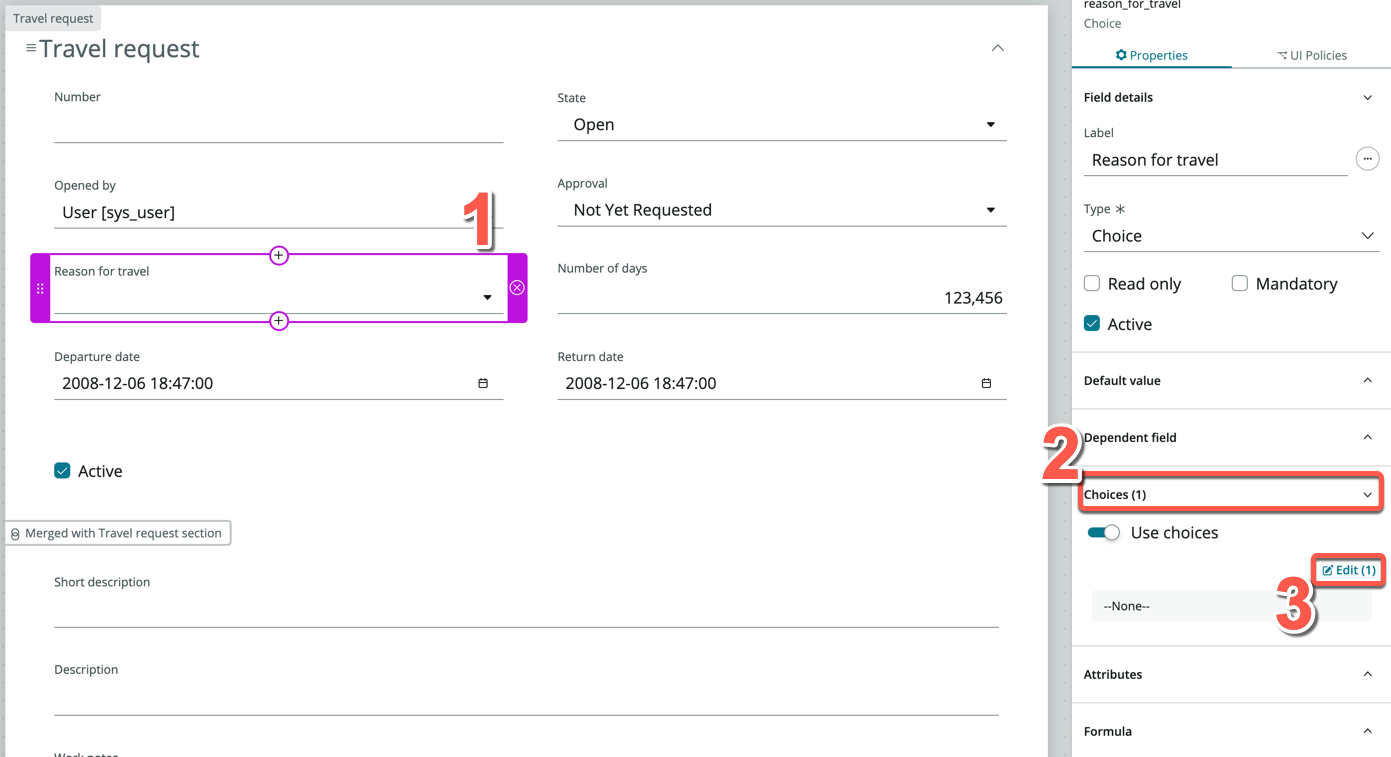
Within you form, locate and click Reason for travel
-
The right-side panel will update for the configuration of this field. Expand Choices, then click Edit (1)
-
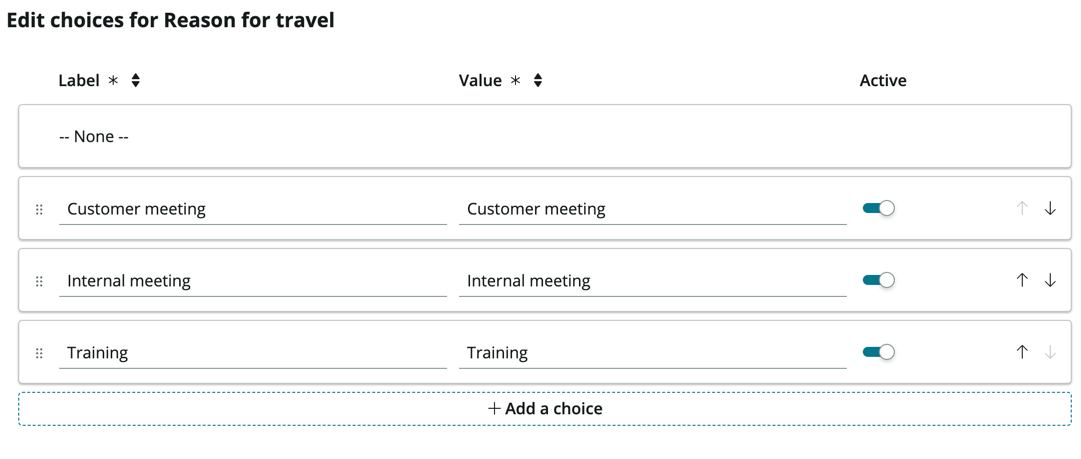
On the Edit choices for Reason for travel screen, click + Add a choice
-
Under Label, enter Customer meeting, the Value field should auto-populate
-
Add another two Labels: Internal meeting and Training
-
On the bottom right, click Apply
-
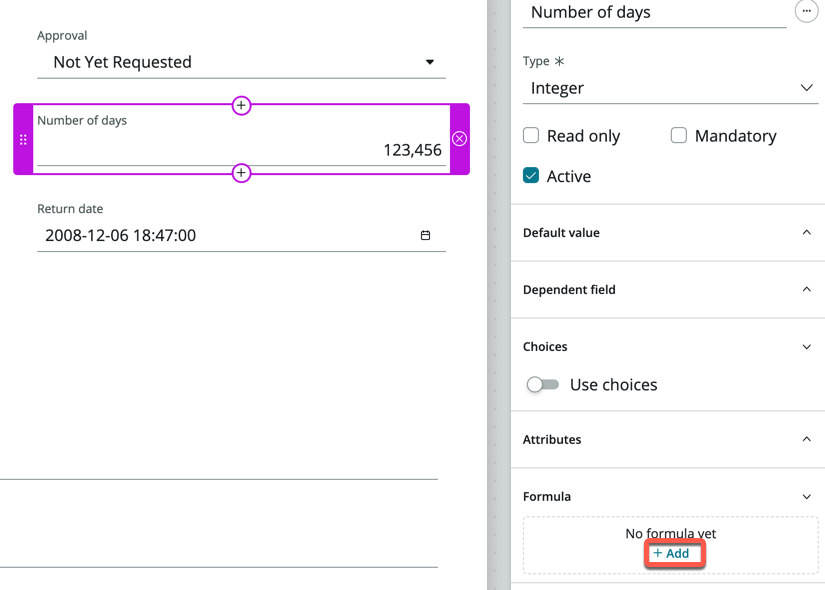
Click Number of days
-
On the right-side panel, expand Formula and click +Add
-
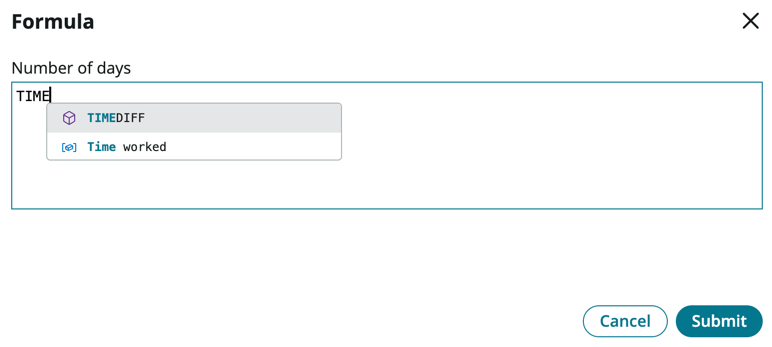
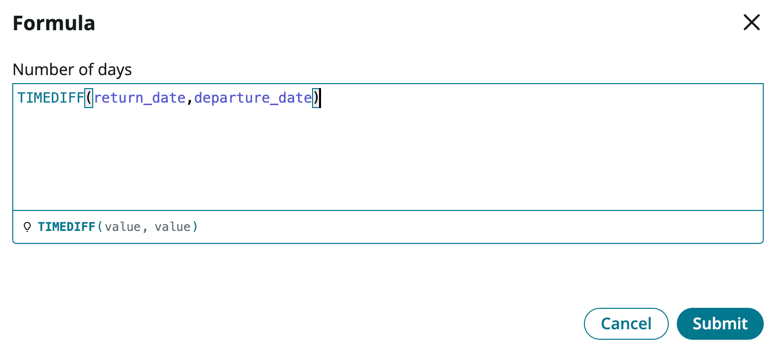
In the pop-up Formula box, you are able to enter Excel based formulas. Here, we would like to calculate the number of days traveled
-
Enter TIME, the it should automatically pickup the operator for TIMEDIFF, press Enter
-
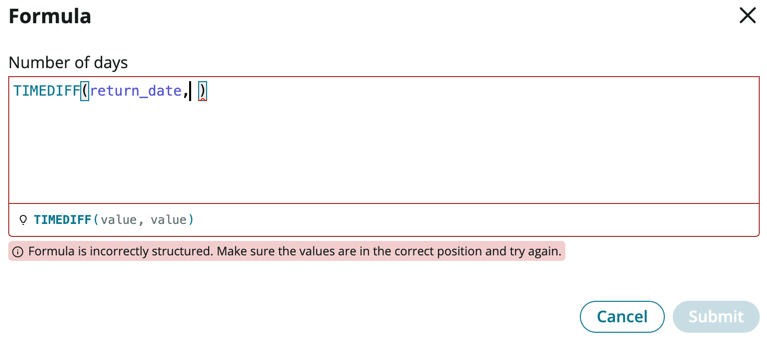
The inputs are shown in the formula example below, we need to provide two different date values
-
Within the brackets, first type *return, then select your custom field **return_date
-
Key in a comma
-
Finish off the formula by entering and selecting departure_date
-
Click Submit
-
Click Save
At this point, we could also capture the Origin and Destination via a String field so that the users can enter free text, but for more consistency, let’s create an Airports table so that users can select these locations (like how you would select on any airline reservation website)
Create an Airport table
-
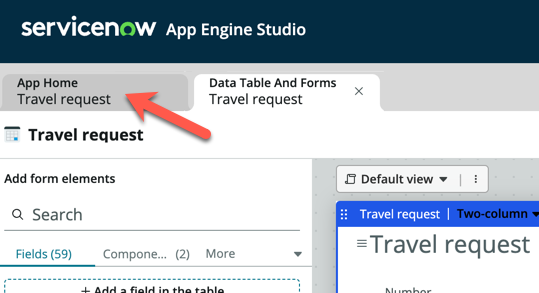
Click the App Home tab to return to the main view
-
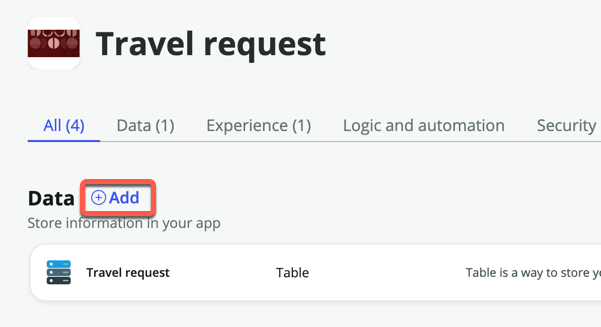
Under Data, click Add
-
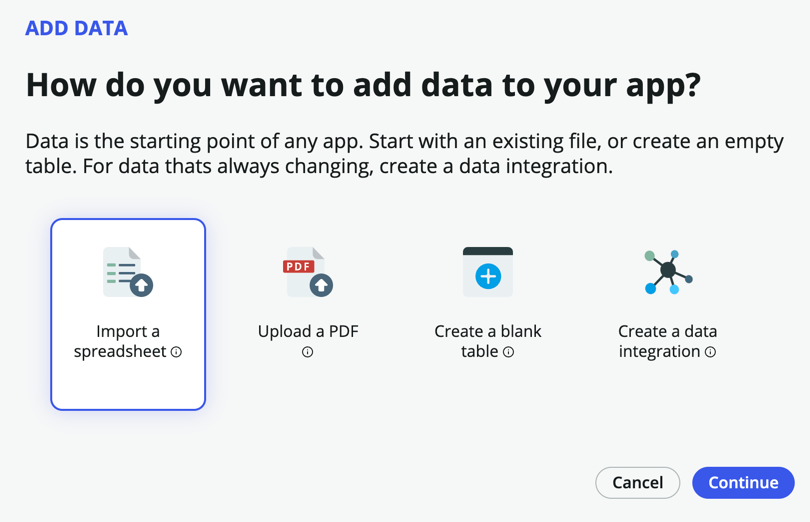
Click Import a spreadsheet
-
Click Continue
-
Download this file: airports.xlsx
-
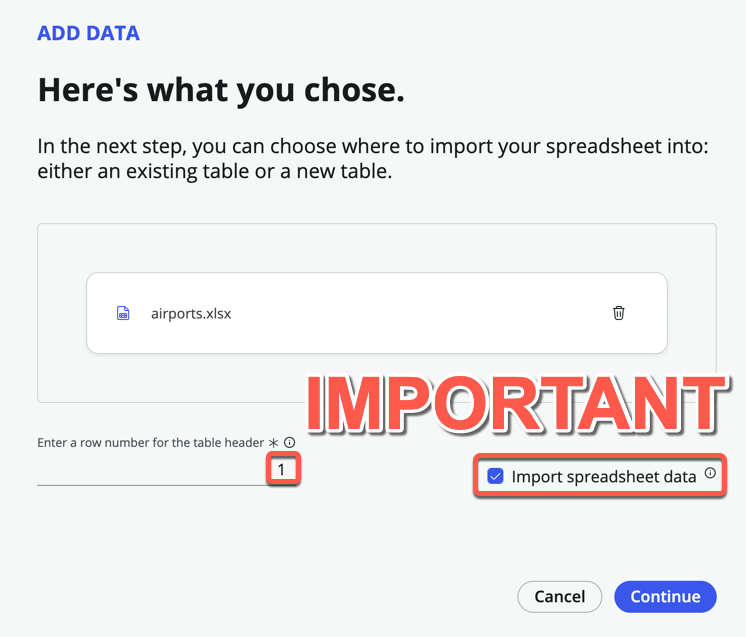
Upload the downloaded file to the upload box. You should see the following screen once the upload is successful
-
Ensure that Enter a row number for the table header is set to 1
-
Check the Import spreadsheet data box
-
Click Continue
-
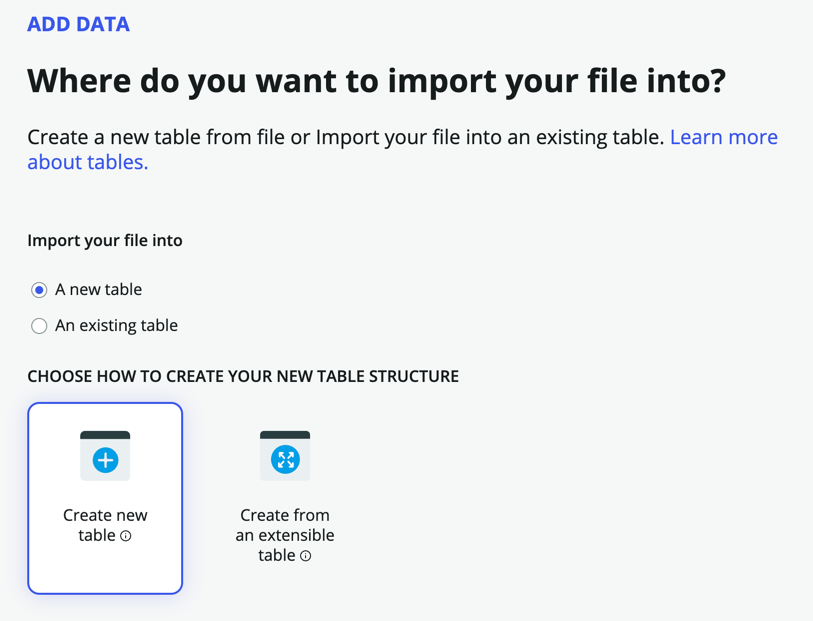
On the following page, click Create new table
-
Click Continue
-
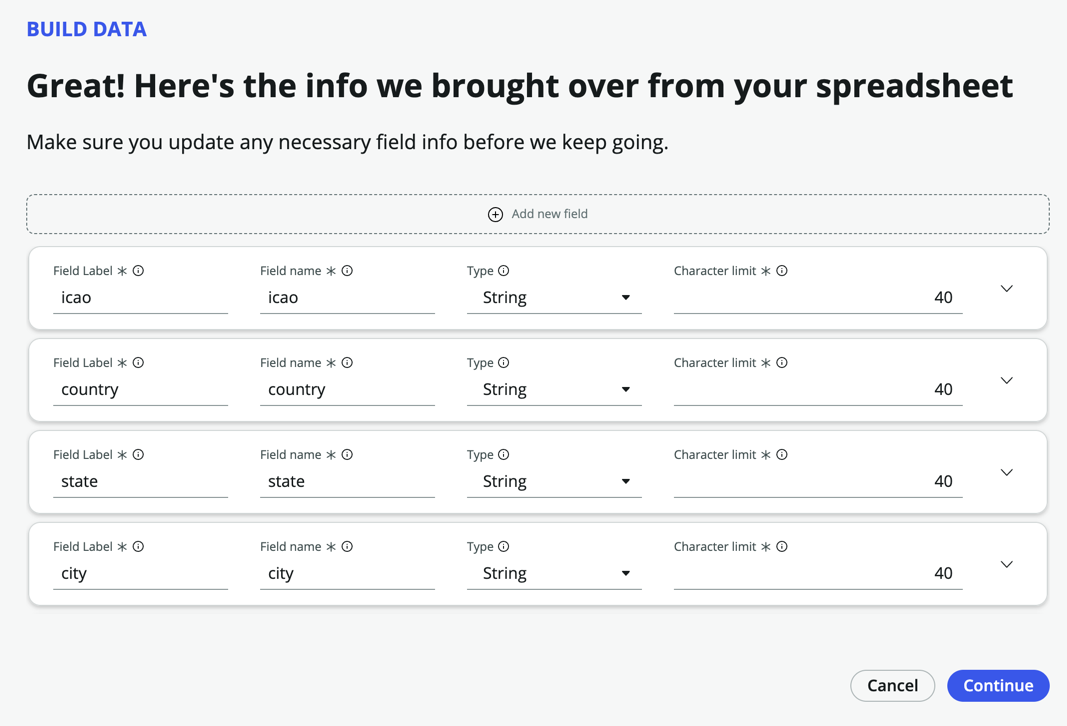
You should land on the page that says: “Great! Here’s the info we brought over from your spreadsheet”
-
Scroll through the list to see all the fields that will be created. Notice that you can change the data Type if necessary, but we can leave everything as String fields for now
-
Click Continue
-
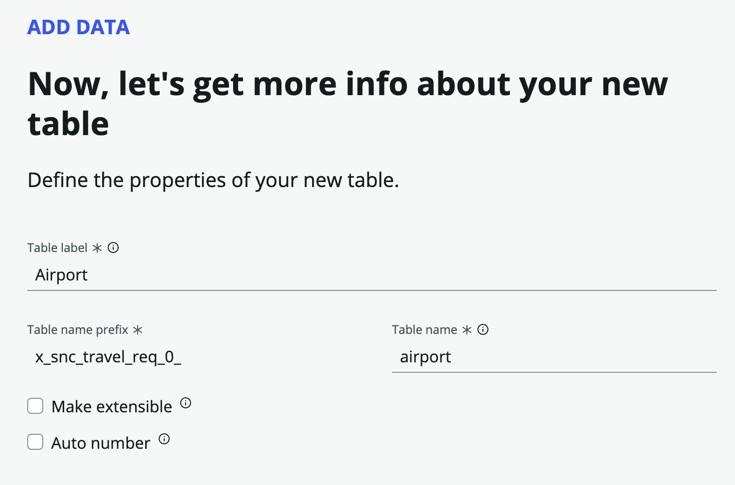
Under Table label, enter Airport. Table name will be automatically populate
-
Click Continue
-
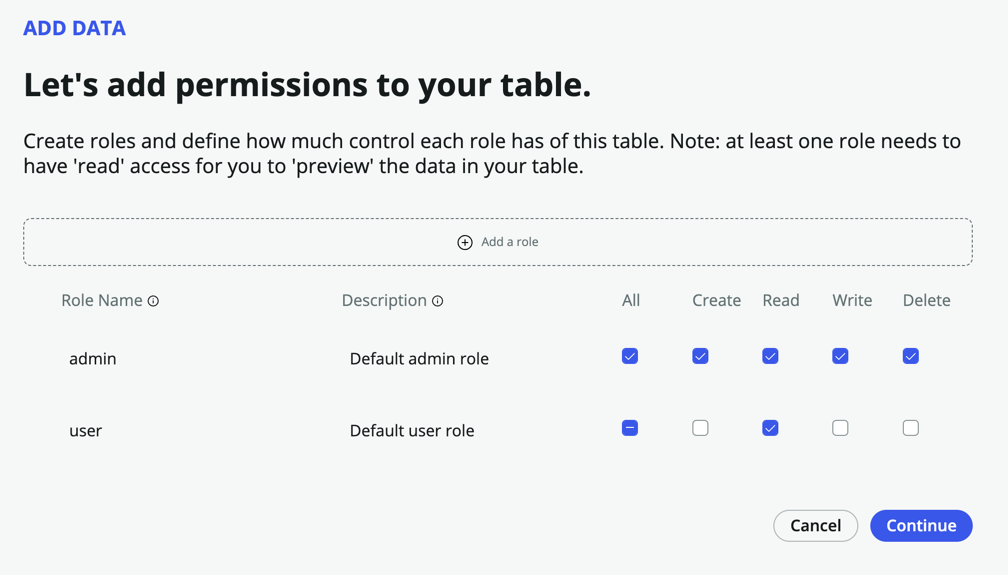
In the roles page, check All for admin, and only Read for user
-
Click Continue
-
Click Edit table
-
You should see the imported data in the Table spreadsheet view
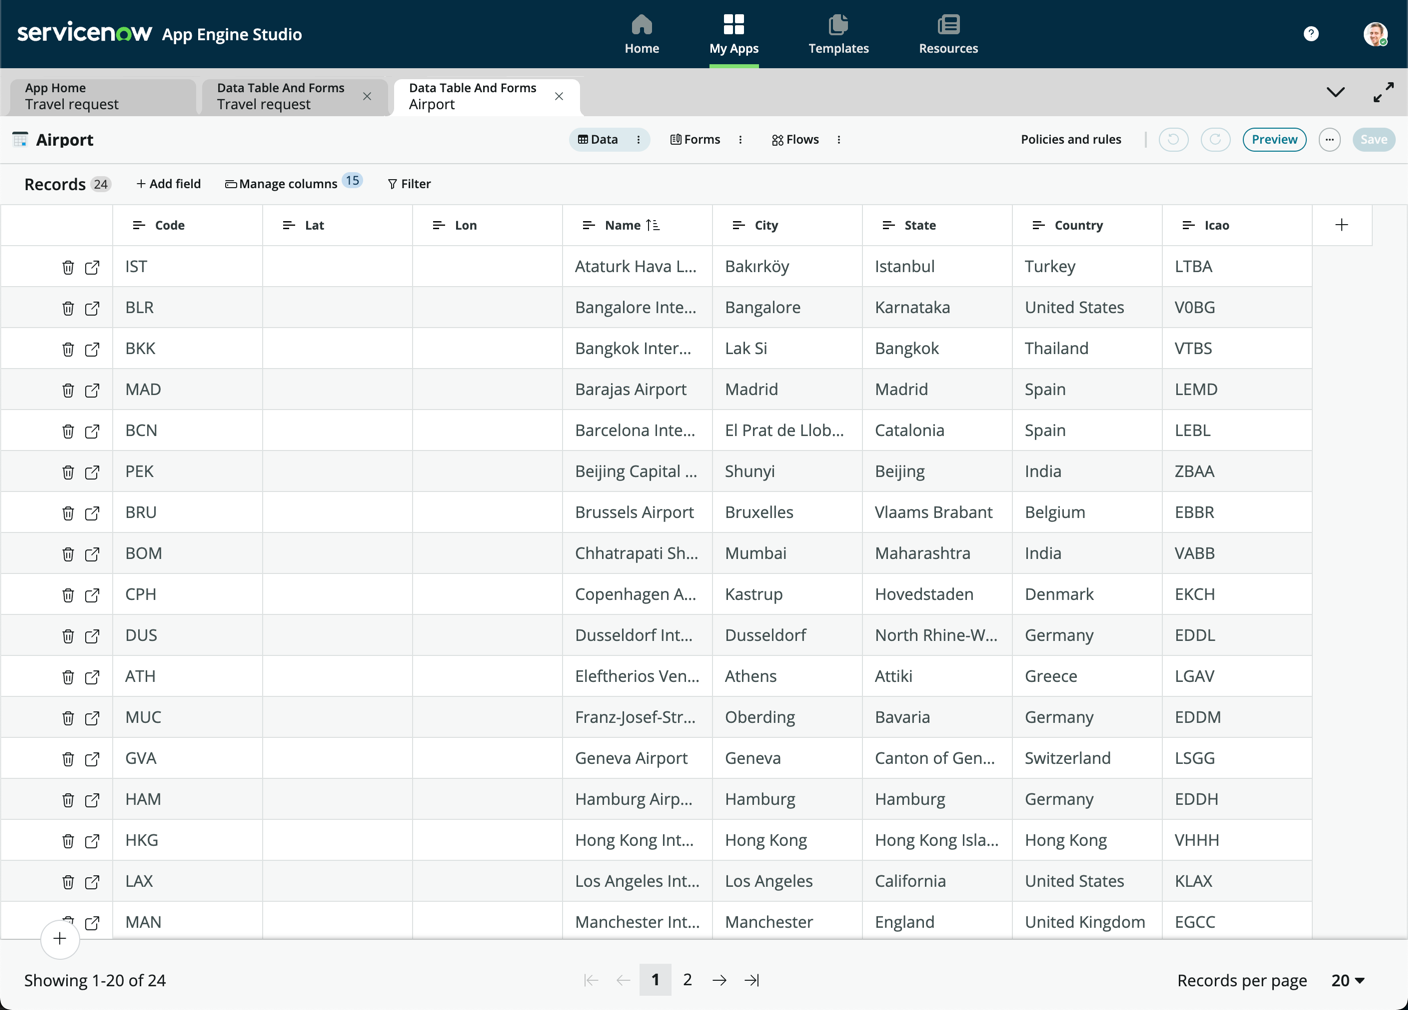
In case you were wondering, the Lat and Lon fields are deliberately left empty. In the optional bonus exercise, we will use an API to get these values, but has no impact on our exercises.
-
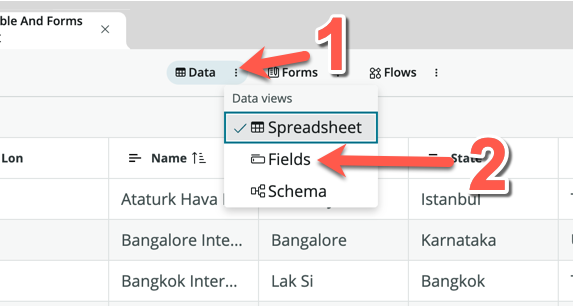
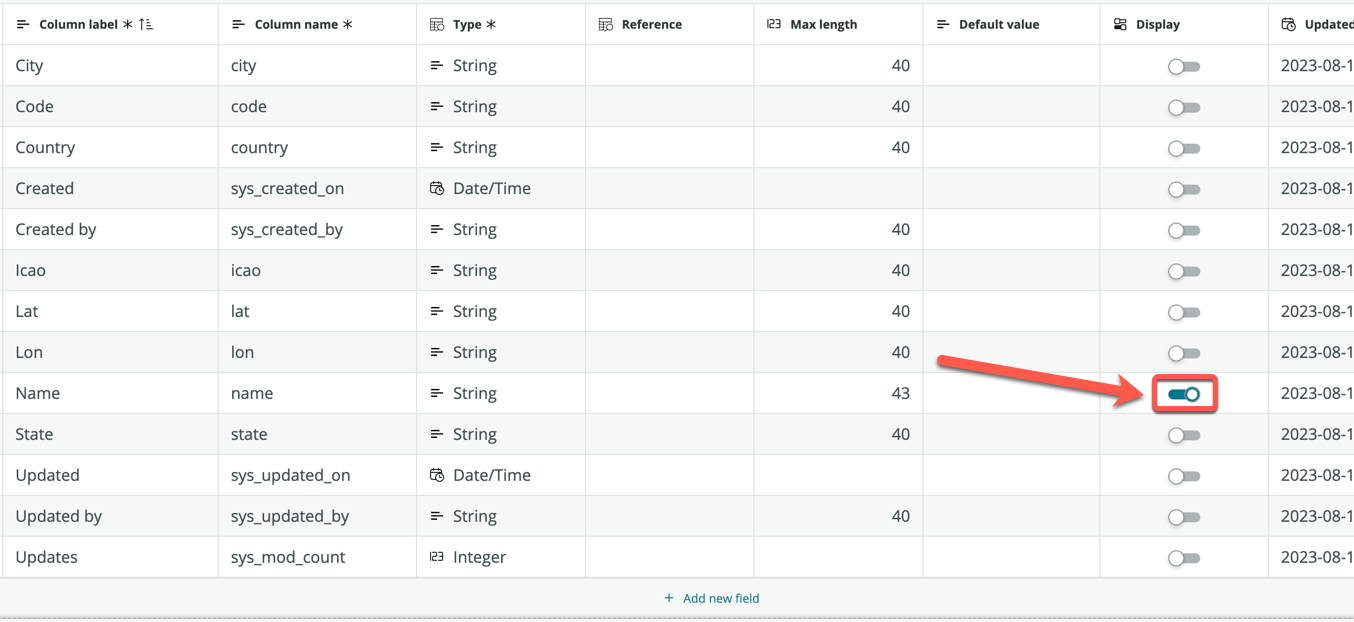
Click more next to the Data pill, and change the Data views to Fields
-
Toggle Display to true for the Name field
-
Click Save
Great, you now have a table to store the list of Airports!
Completing the Travel request table
-
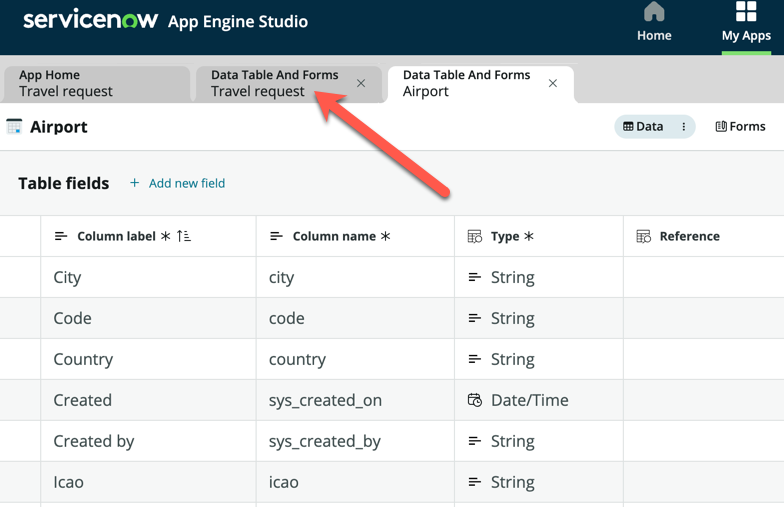
If the Travel request tab is still open, click to navigate to it
-
If not, return to App Home and open the Travel request table, ensure you are in the Form view
-
Click + Add a field in the table, and add the following fields:
Column label Type Travel from Reference (Airport) Travel to Reference (Airport) 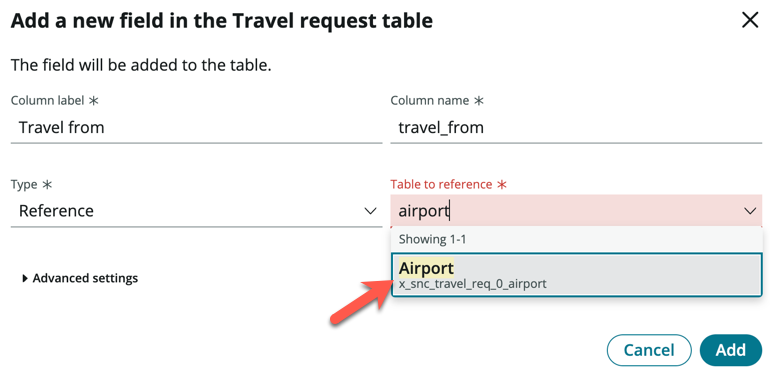
-
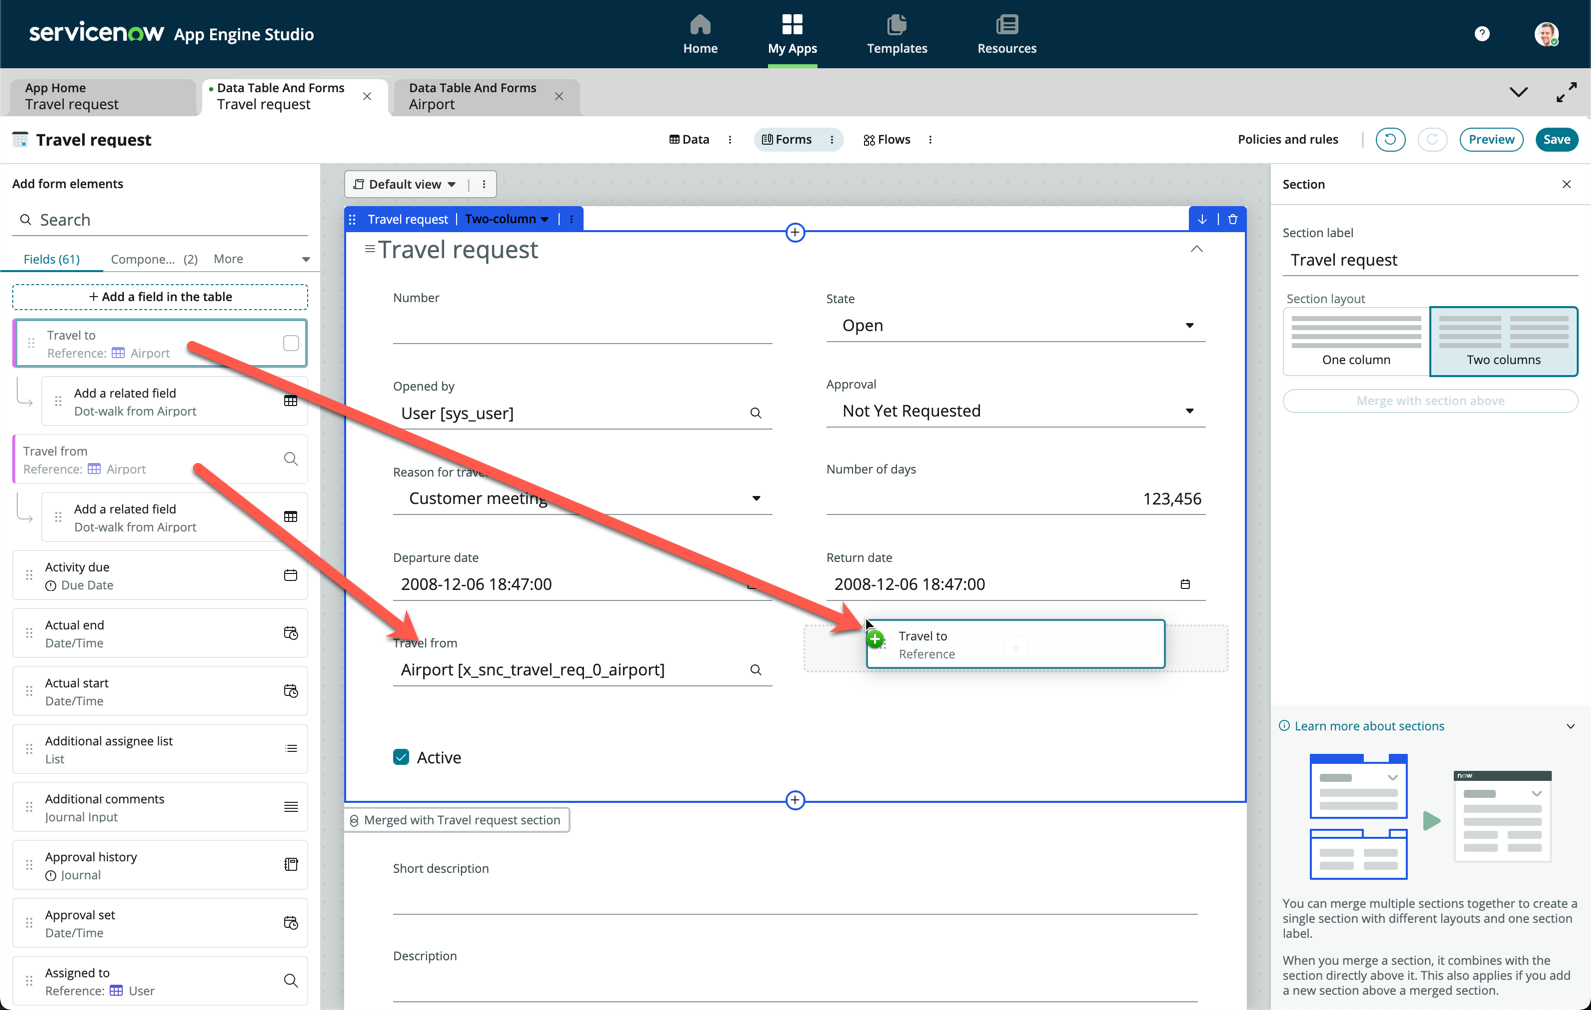
Drag and drop your two newly created custom fields onto the form
-
Click Save
For simplicity, we are not adding additional fields like Daily estimated expenses, etc. You can always choose to add those fields if you want to.
Congratulations, you have completed Exercise 1 and now have a complete way to store the Travel requests from your employees.